
Most homemade rotisserie chickens fail in one of three ways: pale, rubbery skin, scorched wingtips, or a breast dry enough to choke on. If you've been hunting for how to make perfect rotisserie chicken in air fryer toaster oven mode, the fix isn't luck. It's matching your machine, your bird, and a handful of temperatures most recipes skip.
That pattern shows up consistently in manufacturer manuals and USDA guidance alike. A 4-pound bird needs roughly 13 minutes per pound at 375°F, and the USDA sets 165°F as the safe minimum internal temperature for poultry. Get those numbers right and the rest is technique.
Here's the whole formula up front.
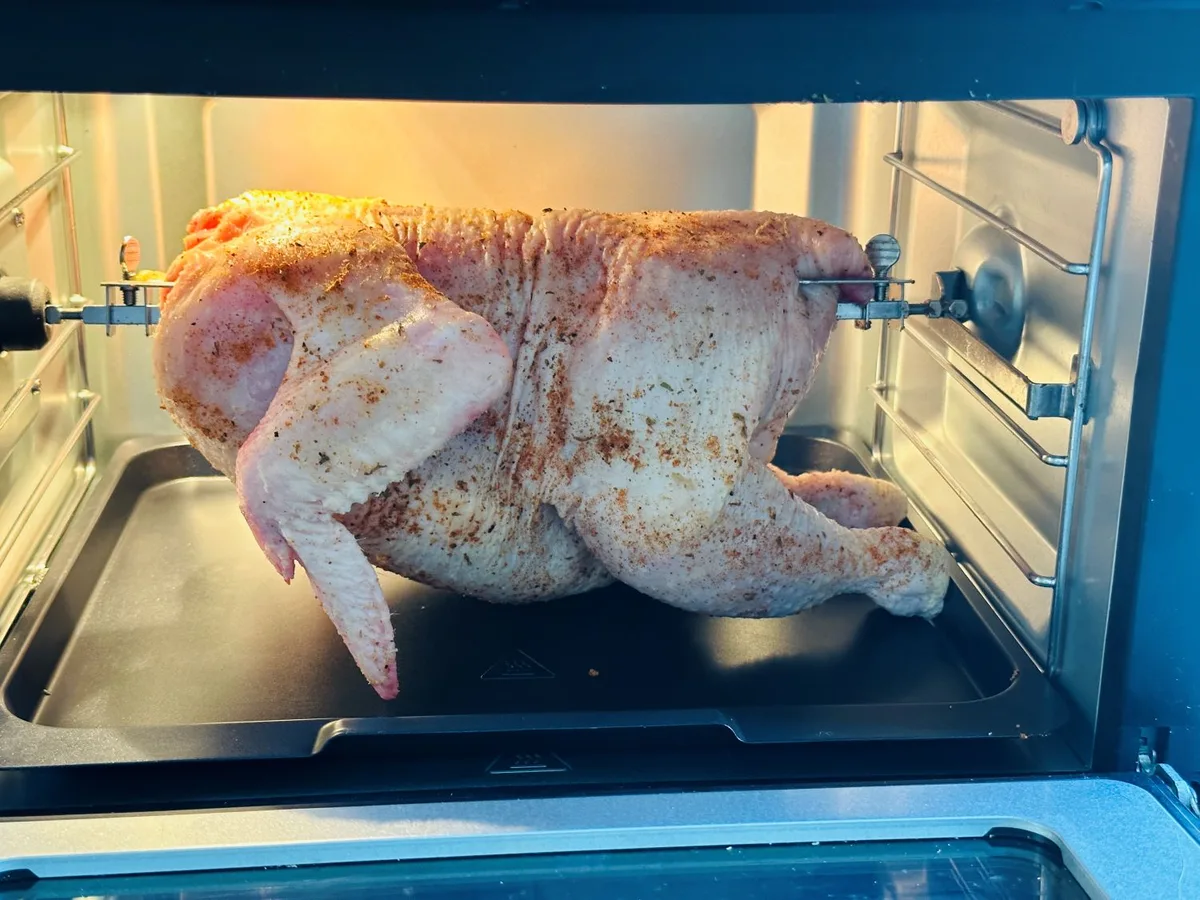
Quick Answer: The 375°F, ~13 Minutes per Pound Formula
Making perfect rotisserie chicken in an air fryer toaster oven comes down to four numbers. Cook at 375°F for about 13 minutes per pound. Pull the bird at 155°F in the thickest part of the breast.
Rest it 10 to 15 minutes before carving. The thigh must still reach 165°F or higher for safety.
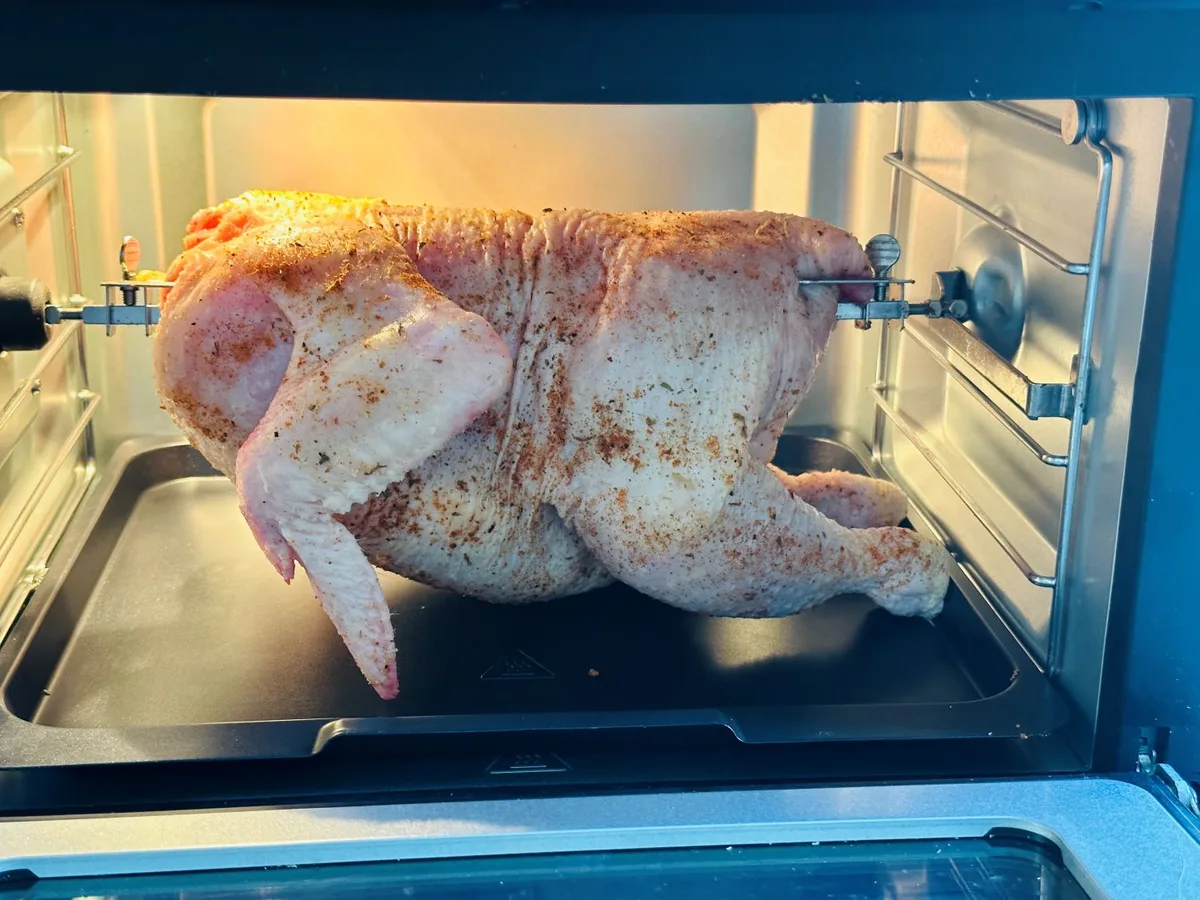
Keep this cheat sheet handy. Every step in this guide feeds back into it.
| Variable | Target |
|---|---|
| Oven temperature | 375°F |
| Cook time | 13 to 15 minutes per pound |
| Breast pull temp | 155 to 160°F |
| Thigh final temp | 170 to 175°F |
| Rest window | 10 to 15 minutes |
Why Most Air Fryer Toaster Oven Chickens Come Out Wrong
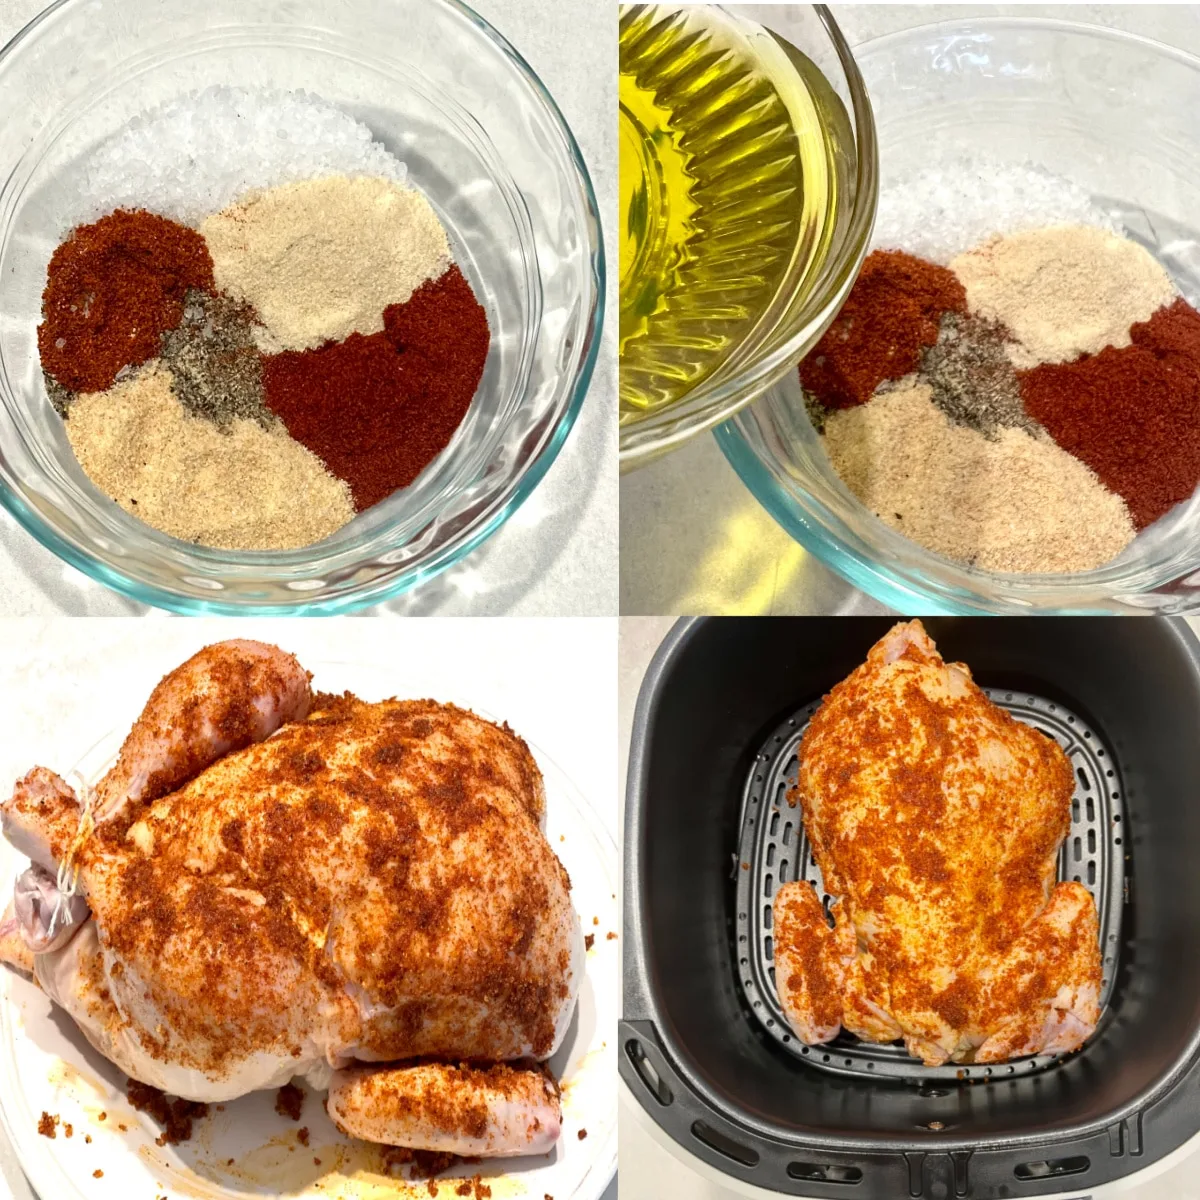
Aggregate buyer reviews and our own editorial analysis of failed attempts point to the same five culprits. None of them involve fancy technique. They're all setup errors.
- The bird doesn't fit. A 5-pound roaster crammed into a cavity built for 4 puts skin right against the heating elements. You get char on top and raw meat near the bone.
- Wet skin goes in. Surface moisture steams instead of crisps. Pat the bird completely dry before it ever sees heat.
- Salt goes on last. Seasoning dusted on right before cooking only flavors the surface. A dry brine, meaning salt applied hours ahead, seasons the meat itself.
- It cooks too long. Old advice says roast until the juices run clear. By the time thigh juices run clear, the breast has blown past done.
- The door keeps opening. Every peek dumps heat and stretches the cook time.
Notice what's missing from that list: complicated rubs, butter injections, basting rituals. Perfect rotisserie chicken is a precision problem, not a flavor problem. Solve the setup and the flavor takes care of itself.
How Rotisserie Mode Actually Cooks the Bird
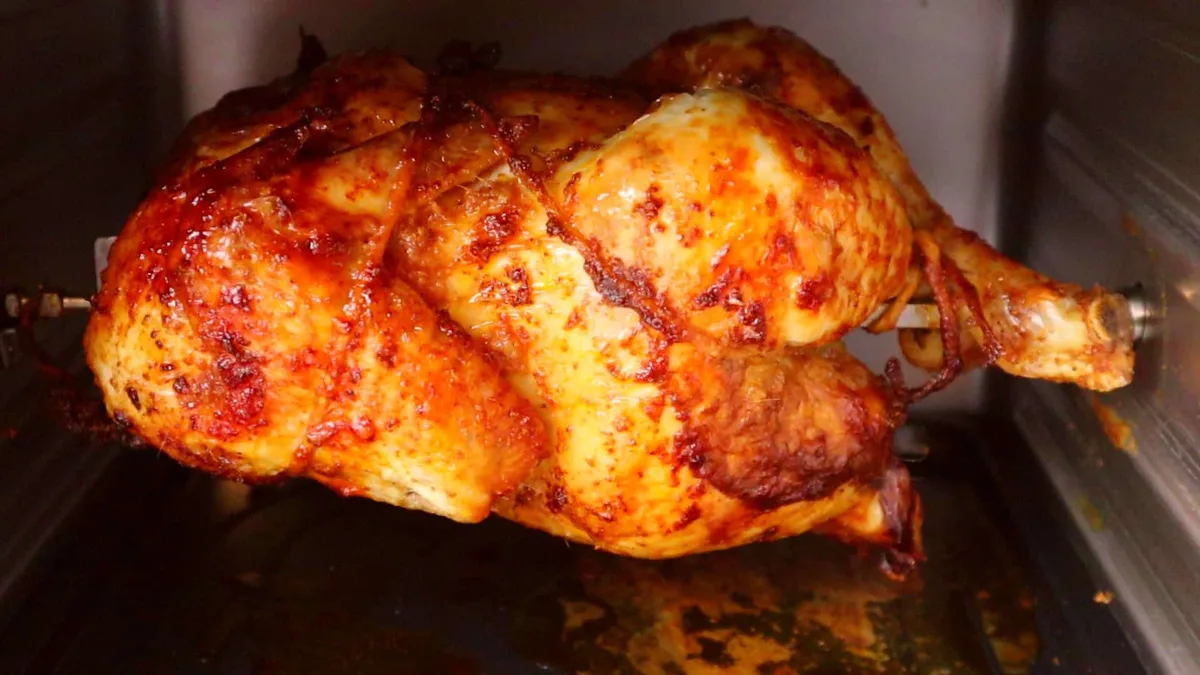
A rotisserie spit does two jobs at once. An electric motor turns the bird slowly through heat radiating off the elements, while a convection fan pushes hot air across every surface. As fat renders, it drips over the bird instead of pooling underneath, so the meat bastes itself.
That's why spit-cooked skin browns evenly with zero flipping.
Compare that to a static oven roast. The side facing the element over-browns while the other side stays pale, which is why traditional recipes demand mid-cook rotations. The spinning spit erases that problem entirely.
Forced-air heat also cooks faster than a standard wall oven, often trimming 25 to 30 percent off the total roast time. If you want the deeper technical background, we explain the airflow difference in a separate guide.
Power-wise, most of these combo ovens draw between 1,500 and 1,800 watts. Our guide to typical power draw breaks down what that means for your electric bill.
Step 1: Check Whether You Have a Real Spit or a Basket-Only Model
Everything downstream depends on this one check, so do it before you buy a chicken. Open the accessory pack and the manual. A true rotisserie setup includes a metal spit rod, two pronged forks, a small handle or screw set, and a socket on one interior wall where the motor connects.
Many kits also include a removal hook for pulling the hot spit out safely.
Found all of that? You're on the spit path. Truss, skewer, balance, and spin, following Steps 3 through 5 below.
Shipped with only trays or a basket? Don't force it. Jump ahead to the faux-tisserie workaround later in this guide.
As of 2026, models shipping with powered spit hardware include the Cuisinart TOA-65, the Breville Smart Oven Air Fryer Pro, the Instant Vortex Plus, the Emeril Lagasse Power AirFryer 360, and the Kalorik MAXX. Basket-only designs like the Ninja Foodi Digital Air Fry Oven skip the spit entirely. Model lineups change yearly, so trust what's in your box over any list.
Still deciding between the two appliance styles? Our breakdown of how these designs compare covers the trade-offs in detail.
Step 2: Pick a Bird That Fits Your Cavity (the 3.5 to 4.5 lb Sweet Spot)
Size kills more birds than any seasoning mistake, so treat it as a hard constraint. Measure your cavity before you shop. Most air fryer toaster ovens clear a bird up to 4 or 5 pounds, and the dependable sweet spot sits between 3.5 and 4.5 pounds.
Grocery stores label birds in this range as fryers. Anything sold as a roaster usually runs 5 pounds and up, and it probably won't clear the elements. When a bird barely fits, the skin touching hot metal scorches while the rest lags behind.
Handle the prep basics before cooking day:
- Buy fresh, or thaw fully in the refrigerator at about 24 hours per 4 to 5 pounds. Never thaw on the counter.
- Pull the giblet bag and neck from the cavity. People forget constantly, and a melted bag is a nasty surprise.
- Save the neck and giblets for stock if you're inclined. Otherwise, discard them.
Unsure whether a specific bird fits? Hold it near the open oven and eyeball the clearance against the top elements. When in doubt, size down.
A slightly smaller bird beats a scorched one every single time.
Step 3: Dry Brine, Truss, and Load the Spit Without Wobbling
Salt is the only seasoning that needs a head start. Sprinkle about 1 teaspoon of kosher salt per pound over every surface, including inside the cavity. Mix in half a teaspoon of baking powder if you want extra-crisp skin.
It raises the skin's pH, which speeds up browning.
Here's the classic trap. If your kitchen only stocks table salt, cut the amount in half. Table salt crystals are far finer, so the same spoonful delivers nearly double the sodium.
Set the bird uncovered on a plate in the fridge. Forty-five minutes is the minimum, overnight is ideal. Before cooking, let it sit on the counter for 30 minutes so the center isn't ice cold.
Then truss it:
- Pat the skin completely dry again. Moisture is the enemy of crisp.
- Tie the legs together with butcher's twine, pulled snug against the body.
- Tuck the wingtips behind the shoulders, or tie them down. Loose wingtips swing into the elements and char.
Now load the spit:
- Thread the spit rod through the cavity lengthwise, from neck to tail.
- Seat both forks deep, one into the breast and one into the rear, then lock the screws tight.
- Hold the spit level and give it a slow test spin. Nothing should dip or drag.
- If one side hangs low, shift the forks slightly until the spin runs even.
An unbalanced bird stalls the motor halfway through dinner. Thirty seconds of balancing saves you that headache.
Step 4: Cook at 375°F and Let It Spin Untouched
Slide the drip tray into the lowest position. Preheat for 5 minutes at 375°F unless your manual's rotisserie preset skips that step. Mount the spit by seating the driven end into the motor socket and resting the other end in its bracket.
Start the rotation first, then confirm the heat is on.
Set your timer by weight:
| Bird Weight | Time at 375°F |
|---|---|
| 3 lb | 40 to 45 minutes |
| 3.5 lb | 45 to 50 minutes |
| 4 lb | 50 to 55 minutes |
| 4.5 lb | 55 to 65 minutes |
After that, hands off. Every peek through the door dumps heat and stretches the cook. The oven light tells you plenty.
Three quick fixes if something drifts:
- Skin darkening too fast? Lay a loose sheet of foil over the top or drop the temp to 350°F.
- Spit stops spinning mid-cook? Something's binding. Cut the heat, reseat the bird, restart.
- Drippings smoking hard? Add a splash of water to the tray to calm it down.
Step 5: Pull at the Right Temperature (Breast 155 to 160°F, Thigh 170 to 175°F)
Pull the bird when the thickest part of the breast reads 155 to 160°F. Angle the probe into the meat's center and keep it away from bone. Bone conducts heat and fakes a higher reading.
This early pull sounds risky until you understand carryover cooking. The bird keeps climbing 5 to 10 degrees while it rests off the heat. By carving time, the breast lands safely past the federal safe-cooking temps without ever drying out.
Dark meat plays by different rules. Check the thickest part of the thigh, again avoiding bone, and look for 170 to 175°F. That extra heat melts collagen and makes the leg meat tender.
The USDA floor is 165°F anywhere in the bird, so treat that as your absolute minimum, never your target.
Rest the bird 10 to 15 minutes under a loose foil tent. Skipping the rest sends the juices straight onto the cutting board instead of staying in the meat. Carve legs first, then lift the breasts off the keel bone in one piece.
The same pull-early logic works for leaner birds like turkey breast, which dries out even faster than chicken.
No Spit? The Basket "Faux-Tisserie" Workaround
No spit doesn't mean settling for bland chicken. You can get close with a rack and a pair of tongs.
Set the trussed bird breast-up on a rack over the drip tray. Cook at 375°F using the same per-pound timing. At the halfway mark, open the door, flip the bird, and spoon the rendered fat back over the skin.
That single flip mimics what the spit does continuously.
Two upgrades worth knowing:
- Raise the rack for the last 10 minutes if your model runs strong bottom heat. It crisps the underside that never sees the top elements.
- Look for a rotating cage accessory. Some brands sell a tumbling rotisserie basket that spins the bird without a spit rod.
Expect honest trade-offs. The top comes out deep golden and crackly. The underside stays a bit softer since it sits in rendered fat.
And you'll lose the self-basting spin, so the breast runs slightly less juicy than a true spit cook.
This method suits weeknight cooks and anyone with a basket-only design like the Ninja Foodi Digital Air Fry Oven. If you'd rather flatten the bird entirely, spatchcocking exposes all the skin at once and cuts the cook time further. You sacrifice the round presentation, though.
Spit vs. Basket vs. Store-Bought: The Honest Trade-Offs
Each route gets you cooked chicken. They differ sharply on skin, effort, and what's actually in the meat.
| Method | Skin Result | Hands-On Effort | Best For |
|---|---|---|---|
| Powered spit | Crackly, evenly browned all over | About 10 minutes of setup | Weekend cooks chasing texture |
| Basket method | Golden top, softer bottom | One flip midway | Weeknight simplicity |
| Store-bought | Reliably crispy | Zero | Zero-effort dinners |
The store-bought column hides a catch worth knowing. Many supermarket rotisserie birds are injected with saline solution, sometimes up to 15 percent of the bird's weight. You're paying chicken prices for saltwater, and a single serving can carry 400 to 500 milligrams of sodium before you season anything yourself.
Cost math favors home cooking too. Whole birds typically run $1.50 to $2 per pound raw, while store birds cost $5 to $10 flat for a smaller animal. An hour-long cook at roughly 1,700 watts draws under 2 kilowatt-hours, which our guide to typical running costs puts at pocket change.
One honest limitation: most countertop cavities cap out around 4.5 pounds. If you regularly feed six or more, our look at roomier oven-style designs covers appliances built for bigger birds.
9 Mistakes That Ruin the Skin, Stall the Motor, or Dry Out the Breast
Most failures trace back to a short list of avoidable errors. Run through this checklist before every cook.
- Skipping the cavity check. A forgotten giblet bag melts and stinks up the whole kitchen.
- Wet skin. Surface moisture steams the bird pale instead of crisping it brown.
- Table salt measured like kosher. The same spoonful carries nearly double the sodium.
- An oversized bird. Skin pressed against the elements scorches while meat near the bone lags behind raw.
- A lopsided spit load. Off-balance weight stalls the motor mid-cook and leaves half the bird underdone.
- Loose wingtips. Untied wings swing into the top elements and char black.
- Cooking by clock alone. Ovens vary by 25 degrees or more. Only a thermometer tells the truth.
- Door peeking. Each look dumps heat and adds minutes to the cook.
- Carving straight off the spit. Skip the rest and the juices pool on the board instead of staying in the meat.
Print it, tape it inside a cabinet door, and glance down before you press start.
Food Safety Rules You Can't Skip With Raw Poultry
Raw chicken carries salmonella and campylobacter, so a few habits are non-negotiable. Per CDC food safety guidance, never rinse raw poultry. Splashing water spreads bacteria across your sink and counters far wider than most people realize.
Follow these rules every single time:
- Thaw only in the refrigerator, about 24 hours per 4 to 5 pounds. Counter thawing is off the table.
- Wash hands with soap for 20 seconds after handling the bird or packaging.
- Use a separate cutting board for raw chicken and cooked carve-down work.
- Verify 165°F with a thermometer in the thigh. Color and juice clarity both lie.
- Refrigerate leftovers within 2 hours. Cooked chicken keeps 3 to 4 days.
Sanitize the sink, counter, and anything the packaging touched. Hot soapy water handles it fine.
Pro Tips Once You've Cooked a Few Birds
Once the basics click, small upgrades compound fast. Pour the rendered drippings from the tray into a jar. Chilled, the fat rises and solidifies into schmaltz, an old-world cooking fat that makes the best roast potatoes you've ever had.
The juices underneath become instant gravy base.
Don't toss the carcass either. Simmer it with water, an onion, and a bay leaf for two hours and you've got stock that outclasses anything boxed.
Round out the meal without heating the big oven. A batch of quick garlic bread runs alongside the resting bird perfectly, and day-old bread torn into crispy homemade croutons turns shredded leftovers into tomorrow's salad.
Finally, vary the rub once the technique is locked in. Smoked paprika and garlic powder lean barbecue. Lemon zest and black pepper lean bright and summery.
The salt math never changes.
FAQs: Air Fryer Toaster Oven Rotisserie Chicken
Can you rotisserie a frozen chicken?
No. A frozen center throws off every timing assumption and risks a burnt exterior wrapped around raw meat. Thaw fully in the refrigerator first, roughly 24 hours per 4 to 5 pounds, then pat dry and proceed normally.
Do you need to preheat for rotisserie mode?
Usually yes, about 5 minutes at 375°F. Some models' dedicated rotisserie presets skip preheat because the long cook compensates. Check your manual, then stay consistent.
A cold start adds unpredictable minutes to the per-pound math.
Why did my spit motor stop spinning mid-cook?
Nine times out of ten, the bird went off balance or something started dragging. Cut the heat, reseat the forks, confirm nothing touches the walls or elements, and test-spin by hand. Then restart.
Persistent stalling usually means the bird exceeds the motor's rated weight.
How do you get the skin extra crispy?
Three levers: dry brine uncovered in the fridge overnight, add half a teaspoon of baking powder per pound of salt, and pat the skin bone-dry right before loading. Moisture is the only real enemy of crackling skin.
Your Decision Guide: The Path to Perfect Chicken Every Time
Here's the whole workflow compressed into if/then form.
If your model has a powered spit and your bird weighs 3.5 to 4.5 pounds, dry brine overnight, truss tight, balance the load, and spin at 375°F for 13 to 15 minutes per pound. Pull at 155°F in the breast and rest 10 to 15 minutes.
If you're basket-only, run the same temperature and timing, flip at the halfway mark, and baste with the rendered fat.
If you're feeding six or more, size up the appliance or cook two smaller birds back to back.
And if you remember one thing, make it this: the thermometer outranks the timer every single cook. Get the pull temperature right and everything else forgives easily.