
Wondering how to clean baked-on grease off an air fryer toaster oven glass door? You're in the right place. That amber film isn't regular dirt.
It's cooking oil that repeated heating has cured into a varnish-like layer, and every cook cycle bonds it a little tighter.
Here's a spec that shapes the whole job: these doors use tempered safety glass, which crumbles into small pellets instead of sharp shards when it breaks. Heat stress, not scrubbing, is what usually cracks it. A replacement door runs $20 to $60 as of 2026, so protecting the original pane saves real money.
Start with the quick answer below, then we'll build from there.
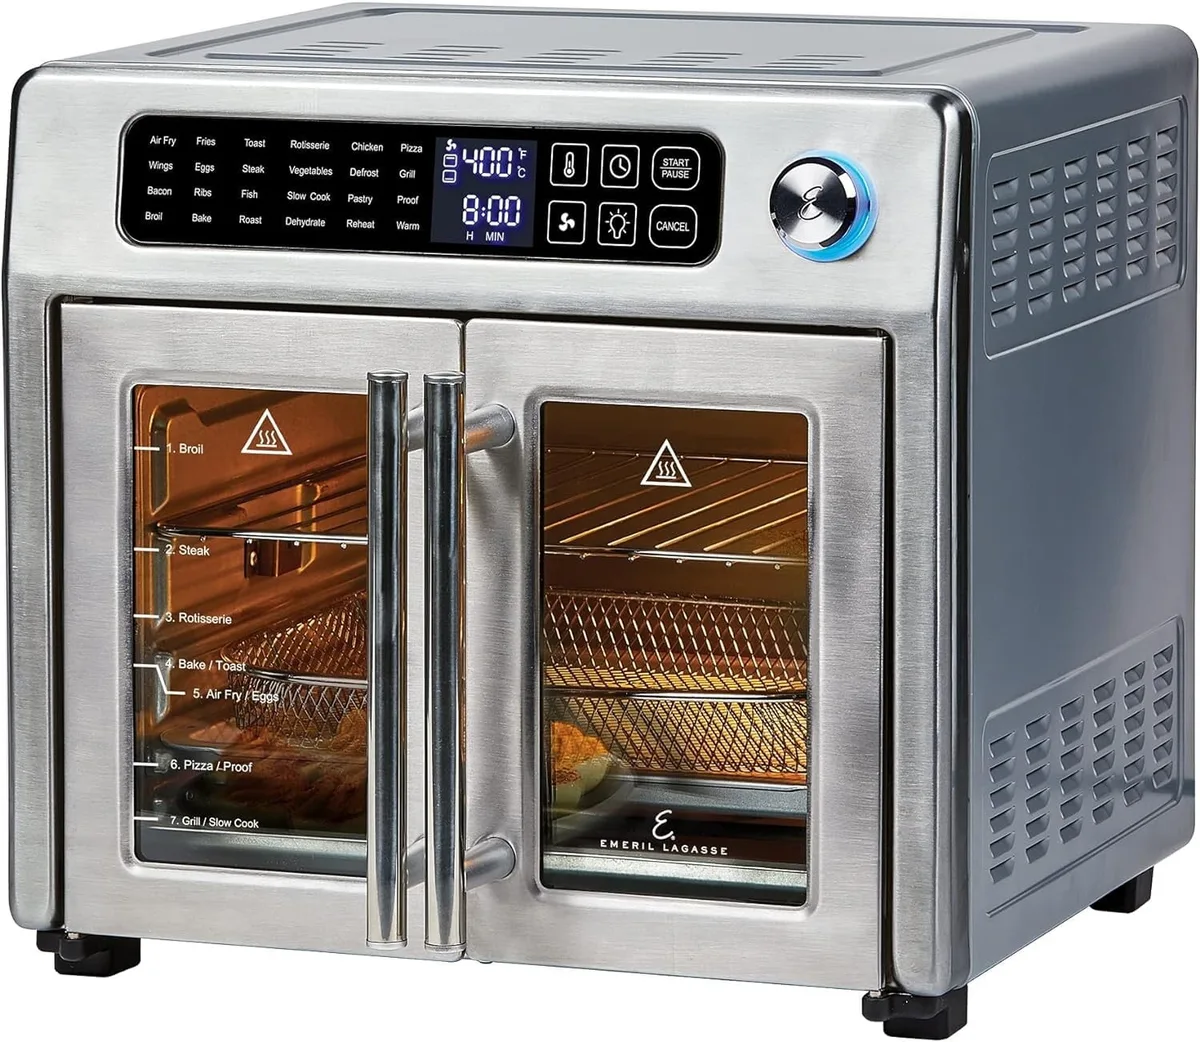
Image source: Web (Bing) / walmart.com (Web image (fair-use with source credit))
Quick Answer: The Safe Way to Clean a Greasy Glass Door in About 20 Minutes
Baking soda paste removes baked-on grease from air fryer toaster oven glass doors. Unplug the unit and let the glass cool completely. Spread the paste on and wait 15 to 20 minutes.
Scrape gently with plastic, then wipe with hot soapy water. Finish with a vinegar rinse and a dry microfiber buff.
Why Baked-On Grease Turns Your Air Fryer Oven Door Amber (and Why Dish Soap Alone Stops Working)
That amber tint starts life as ordinary cooking spray and drippings. When fat sits on glass near 350°F or hotter, it oxidizes. Cycle after cycle, its molecules cross-link and harden into a varnish-like film.
Food scientists call this polymerized oil, the same reaction that seasons cast iron.
An air fryer toaster oven speeds the whole thing up. Its convection fan blasts hot air hard enough to atomize fat and spray it across the door. Cook fatty foods often, think bacon or high-fat air fryer cooks, and the film builds in weeks instead of months.
Dish soap quits working for a simple reason. Surfactants surround fresh grease and float it away in water. Polymerized oil has already cross-linked, so it barely dissolves anymore.
You need an alkali soak to soften the film, then light scraping, then a polish.
Before You Scrub: 3 Checks That Decide Your Entire Approach
Three quick checks tell you which cleaning path is safe for your oven. Skip them and you risk a cracked pane or a dead door.
Check 1: Is the Glass Fully Cool?
No, warm glass never gets cleaned, period. Tempered panes shrug off slow, even heat. Hit one spot with a cold, wet cloth and the sudden contraction can crack it instantly, or set up a delayed break days later.
Unplug the unit and wait 30 to 45 minutes until the door feels room-temperature.
If a pane ever cracks with no impact at all, check the model against CPSC recall alerts before buying a replacement.
Check 2: Do You Have a Single-Pane or Double-Pane Door?
Open the door and look closely, or inspect the edge. A single-pane door shows one sheet of glass with the cavity directly behind it. A double-pane door shows two sheets separated by a small gap, often with a spacer along the edge or a screwed-on frame bezel.
Most midrange and premium models, including Breville and Cuisinart combos, use double-pane doors for heat retention.
This matters because haze trapped between the panes can't be reached from outside. That job requires door removal, which we cover further down. Coated or tinted inner panes also limit which tools are safe.
Check 3: Does Your Door Detach at the Hinges?
Your owner's manual holds the answer. Look for hinge pins, clips, or a latch-release tab near the bottom hinges. Manufacturer documentation confirms the mechanism varies by model, so don't force anything that resists.
A detachable door is good news. You can lay it flat on a towel, clean both faces with gravity on your side, and reach the edges properly. A fixed door just means working vertically and keeping drips away from the hinge pivots.
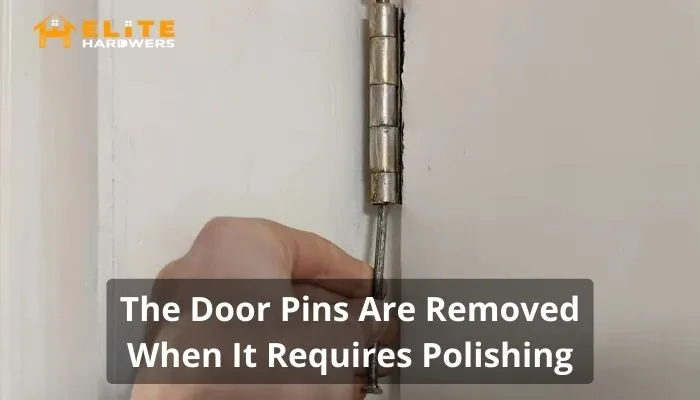
Image source: Bing (Web (fair-use with source credit))
Match the Method to the Mess: Grease Film vs. Polymerized Varnish vs. Carbon Crust
Grease damage comes in three stages, and each one needs a different attack. Drag a fingernail across the cool glass to place yourself.
| Stage | What you see | Best treatment | Dwell time |
|---|---|---|---|
| Light film | Faint cloudy sheen, wipes off with effort | Hot soapy water and microfiber | None |
| Polymerized varnish | Amber or tan layer, feels tacky | Baking soda paste plus plastic scraper | 15 to 20 minutes |
| Carbon crust | Black flakes or hard glossy spots | Repeat paste cycles, or a targeted degreaser | Up to overnight |
The rule is simple: start gentle and escalate only if the glass argues back. Jumping straight to harsh chemicals risks the non-stick cavity coating and leaves fumes near your food chamber. Save commercial degreasers for true carbon buildup, and keep caustic oven cleaner away entirely, since it's formulated for bare metal cavities, not glass beside your dinner.
Carbon crust usually traces back to weeks of fatty cooking, from bacon strips to oily frozen sides. Expect two or three paste rounds rather than one heroic session. Patience beats pressure every time on tempered glass.
Stage 1 Cleanup: Light Grease Film with Hot Soapy Water and Microfiber
Light film is the easy win, and catching it here means you never meet stage two. Work through these steps in order:
- Unplug the oven and remove the racks, crumb tray, and air fry basket.
- Lay a towel under the door edge to catch drips.
- Mix a few drops of dish soap into a bowl of hot tap water, around 120°F.
- Dip a folded microfiber cloth, wring it lightly, and wipe in overlapping strokes.
- Refold to a clean side often so you're lifting grease, not smearing it.
- Follow with a clean-water wipe, then buff dry with a fresh microfiber.
Work horizontally if your door detaches, since gravity keeps the solution on the glass instead of running into the hinges. Rinse thoroughly at the end so no soap film stays behind near your food chamber, which is basic food-contact surface hygiene. Wipe the door down after greasy runs like breakfast meats or roast chicken thighs, and stage two never gets a foothold.
Stage 2 Cleanup: Dissolving Polymerized Grease with a Baking Soda Paste
Baking soda paste is the workhorse for amber polymerized film, and it's the strongest cleaner you can safely put on tempered glass. Sodium bicarbonate is a mild alkali, so it breaks down cross-linked oil instead of just smearing it. Mix three parts baking soda with one part water until it spreads like cake frosting.
Then work through this sequence:
- Unplug the oven and confirm the glass feels room temperature.
- Spread the paste over the film, about 1/8-inch thick.
- Let it dwell for 15 to 20 minutes. Mist lightly if the edges start drying out.
- Hold a plastic scraper at a shallow 30 to 45-degree angle and push the softened film off in short strokes.
- Wipe away the slurry with a damp microfiber cloth.
- Repeat the cycle anywhere amber still shows.
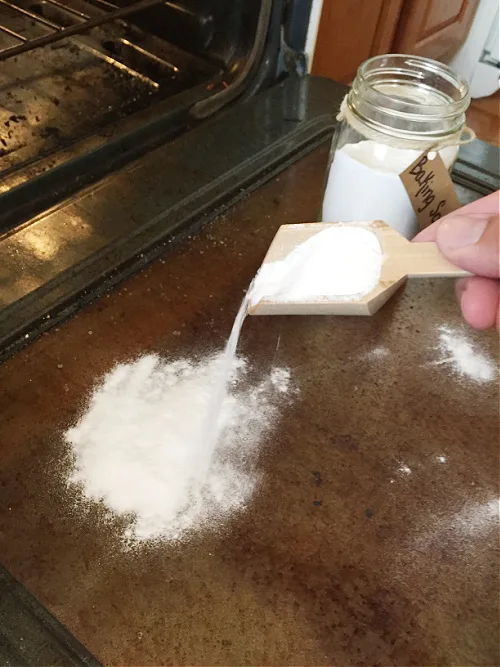
Image source: Web (Bing) / storage.googleapis.com (Web image (fair-use with source credit))
On a fixed door, work in small sections so the paste never dries mid-job. A detachable door laid flat makes things easier, since gravity holds the paste against the glass. Aggregate user reviews consistently report two rounds clears most year-old buildup.
One caution here. Don't grind the paste around under pressure. Let the chemistry do the lifting, because dry scrubbing is how micro-scratches begin.
Stage 3 Cleanup: Cutting Through Black Carbonized Crust Without Scratching
Black carbon crust means oil has burned past varnish into char, and no single session fixes it. Plan on two or three treatment rounds spread over a day or two. Every harsher step adds risk, so escalate slowly.
Start with steam:
- Lay a hot, damp microfiber cloth flat over the crust for 10 minutes. The steam rehydrates the charred surface.
- Apply baking soda paste over the dampened area and extend the dwell to an hour, or overnight on thick spots.
- Scrape gently with plastic, wipe clean, and reassess under bright light.
Still black after two rounds? Move to an alkaline household degreaser like Krud Kutter. Apply it to a cloth, never spray it, so mist can't drift onto heating elements or the non-stick cavity.
Give it 10 minutes, scrape, then rinse twice.
Caustic oven cleaner stays out of this job entirely. It's formulated for bare metal cavities, and residue lingering near your food chamber is a bad trade. Crust like this usually traces back to months of fatty runs, from bacon to oily frozen favorites.
If three honest attempts fail, price a replacement door at $20 to $60 before you gamble the pane.
Cloudy Spots Between the Panes: Removing the Door and Cleaning the Inner Glass
Haze trapped between double-pane glass can't be cleaned from outside, so the real fix is removing the door and opening the frame per your manual. Double-pane doors sandwich two glass sheets around a sealed air gap for insulation. When grease wicks into that gap through a worn edge seal, wiping the outer face does nothing.
Manufacturer documentation confirms most Breville, Cuisinart, and Ninja combo doors come apart, though the exact method varies by model. Find your manual before touching a single screw.
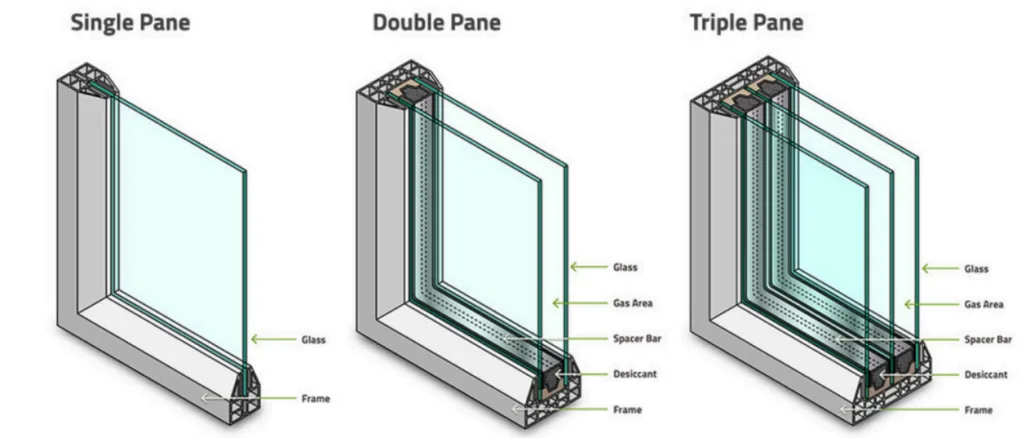
Image source: Web (Bing) / mazglass.com (Web image (fair-use with source credit))
If Your Door Detaches (Hinge Pin or Latch Release)
- Open the door to the position your manual specifies, often fully open or partway.
- Press or lift the hinge tabs, then raise the door off its pins with both hands.
- Lay it flat on a folded towel, glass side up.
- Remove the frame bezel screws and lift the inner pane free.
- Clean both faces using the baking soda method, then dry them completely.
- Reassemble and test the swing before plugging the unit back in.
Never dunk the whole door in a sink. Many models run wiring through the hinge into the handle light, and water ends that feature permanently. Check your warranty terms first too, since unauthorized teardown can void coverage.
If Your Door Is Fixed (Frame-Screw Access)
Some fixed doors expose the inner pane through screws along the frame bezel. Support the glass with one hand while backing the screws out, clean both faces, and reverse the order. If there's no screw access at all, that interior haze isn't reachable without professional service, and replacement becomes the practical call.
Razor Blade, Plastic Scraper, or Magic Eraser? What Each One Actually Does to Your Pane
Plastic scrapers are safe on every pane, razor blades are safe only on bare single-pane glass, and magic erasers are a gamble on anything coated. Here's the full breakdown:
| Tool | Safe on | The catch |
|---|---|---|
| Nylon or plastic scraper | All glass, coated included | Slowest option |
| Razor blade | Bare single-pane tempered glass | Scratches coatings and tints instantly |
| Magic eraser | Fresh grease on bare glass | Melamine foam acts like fine sandpaper |
| Steel wool | Nothing here | Etches scratches and leaves rust specks |
Two habits make any scraper safer. Keep the surface wet or pasted so debris floats, and hold the blade flat at roughly 30 degrees, never upright. Dry scraping drags hardened crumbs across the glass and etches lines you'll see forever.
Coated or low-E inner panes change the math. Editorial analysis of manufacturer care guides shows brands like Breville explicitly warn against abrasive pads and blades on treated surfaces. When in doubt, plastic wins.
It also helps to know which cooks cause the mess. Low-mess daily cooks shed almost no fat, while bacon and sausage do most of the damage.
Don't Skip the Finish: Vinegar Rinse, Clean-Water Pass, and Streak-Free Buff
Skipping the finish is why doors look hazy even after successful cleaning. Leftover baking soda dries into a white film, and hard-water minerals streak as they evaporate. White vinegar handles both problems in one pass.
- Wipe the glass with a 50/50 mix of white vinegar and water.
- Follow with a clean-water pass to lift the acid and loosened residue.
- Buff dry with a fresh microfiber in overlapping circles.
- Tilt the pane toward a light source to catch any streaks you missed.
Once everything is bone dry, run the empty oven at a low setting for 10 minutes. That short burn-off evaporates moisture hiding near the gasket. Going forward, oil-free snack runs and quick wipe-downs will stretch the time between deep cleans considerably.
Mistakes That Crack Tempered Glass, Short Out Door Wiring, or Void Your Warranty
Most damaged doors trace back to a handful of preventable errors. Editorial analysis of manufacturer care guides and warranty terms keeps surfacing the same offenders:
- Cleaning warm glass. Even a slightly warm pane plus a cool damp cloth invites thermal shock.
- Submerging the door. Water wicks into hinge wiring and kills handle lights permanently.
- Razor blades on coated panes. One pass scratches low-E or tinted coatings beyond repair.
- Dry scrubbing with melamine foam. Magic erasers etch fine scratch networks into bare glass too.
- Caustic oven cleaner near the cavity. Fumes and residue land inches from your food chamber.
- Forcing hinge pins or bezel screws. Stripped heads turn a $30 cleaning job into a $60 door replacement.
- Skipping the manual before teardown. Unauthorized disassembly voids coverage on most brands.
If you've already made one of these mistakes, stop and reassess rather than pushing harder. Escalating pressure on compromised glass is how small chips become full failures mid-cook.
Safety Rules You Can't Bend: Thermal Shock, Hidden Hinge Wiring, and Degreaser Fumes
Three rules protect you, the appliance, and your dinner. Break them and the consequences arrive fast.
Thermal shock: Unplug first, then give the door 30 to 45 minutes to reach room temperature. Never set a hot door on a cold counter, and never chase grease with cold water. Tempered glass tolerates slow heat beautifully and sudden gradients terribly.
Hidden wiring: Treat every door as if wires run through the hinges until your manual proves otherwise. Spot-clean vertically instead of soaking, and keep liquids away from pivot points entirely.
Chemical fumes: Ventilate the kitchen when any solvent-based degreaser is in play. Apply products to cloths, never spray toward the oven, and rinse every cleaned surface twice so nothing lingers near food. A chipped or star-cracked pane gets replaced, not cleaned around, because compromised tempered glass can fail without warning during an ordinary cook.
Keep It Clear: The Weekly Wipe and Monthly Deep-Clean Routine
A five-minute habit beats an hour-long rescue every time. Here's the cadence our research supports for daily users:
| Frequency | Task | Time |
|---|---|---|
| After fatty cooks | Wipe the cooled door with a damp microfiber | 2 minutes |
| Weekly | Hot soapy water pass, then dry buff | 5 minutes |
| Monthly | Baking soda paste on any amber spots | 20 minutes |
| Quarterly | Vineger polish and gasket check | 10 minutes |
Wipe-downs matter most after buttery runs like garlic bread or anything that splatters. Fresh grease lifts with plain soap. Cured grease needs chemistry.
Catching film at the sheen stage means you'll likely never meet the carbon crust stage at all.
FAQs: Air Fryer Toaster Oven Glass Door Cleaning
Can I use oven cleaner on my air fryer toaster oven glass door?
No, skip caustic oven cleaners entirely. They're formulated for bare metal cavities, not tempered glass beside a food chamber. Residue and fumes linger near where you cook.
Baking soda paste handles baked-on grease safely, and an alkaline household degreaser covers the worst carbon buildup.
Why does my glass still look cloudy after cleaning?
Three usual suspects: leftover baking soda dried into white film, hard-water minerals streaking as they evaporate, or haze trapped between double panes. The first two fix with a vinegar rinse and buff. Between-pane haze requires door removal per your manual, since outside scrubbing can't reach it.
How do I remove the door for deep cleaning?
Check your owner's manual for hinge pins, clips, or a latch-release tab near the bottom hinges. Open the door to the specified position, release the mechanism, and lift straight off with both hands. Manufacturer documentation confirms methods vary by model, so never force resistance.
Is a razor blade safe on the glass?
Only on bare single-pane tempered glass, kept wet, held at about 30 degrees. Any coated, tinted, or double-pane surface gets scratched instantly by steel. A nylon plastic scraper is slower but safe on every pane type, which makes it the default recommendation.
How often should the glass door be cleaned?
Wipe after greasy cooks once the glass cools, run a soapy microfiber pass weekly, and do a baking soda spot treatment monthly. Daily users who follow this cadence report doors staying clear indefinitely. Neglect for months is what creates the overnight-soak scenarios.
Final Decision Guide: Your Next Move Based on Door Type and Grease Severity
Everything above collapses into four paths. Find yours and act accordingly.
Bare Single-Pane Glass: Full Toolkit Available
Use the complete escalation ladder: soapy water, baking soda paste, plastic scraper, then razor blade as a last resort. Keep everything wet and work at shallow angles. This pane forgives almost every careful technique.
Coated or Tinted Pane: No-Razor Route
Stick to baking soda paste, nylon scrapers, and microfiber only. Skip razors, magic erasers, and abrasive pads completely, since coating damage is permanent. Two patient paste rounds beat one aggressive session here.
Haze Trapped Between Panes: Disassembly or Replacement Call
Outside cleaning cannot reach this haze, period. If your door detaches and the manual shows frame screws, open it and clean both inner faces. No screw access means professional service or a replacement door at $20 to $60 as of 2026.
Chipped, Cracked, or Shocked Glass: Stop Cleaning, Replace the Door
Any chip, star crack, or spontaneous break ends the cleaning conversation. Compromised tempered glass fails without warning, sometimes days later during normal use. Order the model-specific replacement door, verify the part number against CPSC recall listings first, and swap it before the next cook.