
So you’re trying to figure out how to roast a whole 6lb chicken on air fryer toaster oven rack without burning the wings or undercooking the thighs. It’s completely doable, but it takes more planning than a standard oven roast. The compact cavity, the fan-driven heat, and the tight clearance all change the game.
Here’s the good news: with the right prep and a good thermometer, you can get crispy skin and juicy meat in less time than a big oven. As of 2026, most countertop air fryer toaster ovens max out around 400, 450°F, which is plenty for a proper roast. The USDA safe minimum for poultry is 165°F in the thickest part of the thigh, so that’s your non-negotiable finish line.
Let’s walk through this step by step.
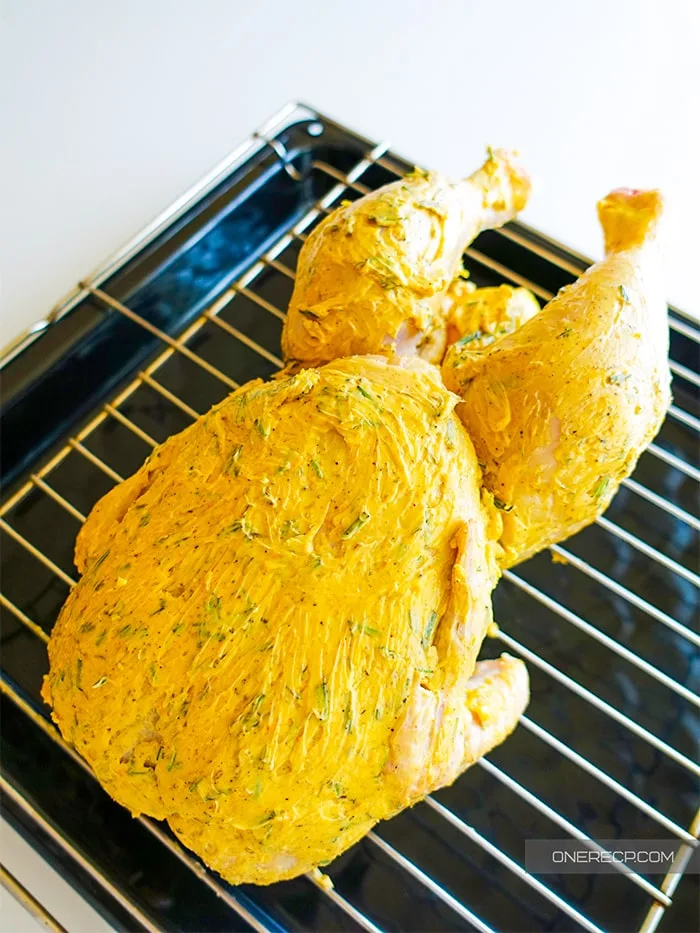
Image source: Web (Bing) / storage.googleapis.com (Web image (fair-use with source credit))
Can You Actually Fit a 6 lb Chicken in a Countertop Toaster Oven?
That depends entirely on your model. Some air fryer toaster ovens have a usable interior of about 12 by 10 inches, with maybe 5 to 6 inches of vertical clearance. Others are smaller, closer to 10 by 8 inches.
A 6 lb chicken is a big bird, and it’s often wider than it looks.
Measure before you shop or prep. If your oven’s rack can hold the chicken without the legs touching the heating element, you’re good. If the bird pushes against the top coil, it won’t cook evenly.
The skin will scorch before the center reaches temperature. That’s a fire hazard and a food safety problem.
You can also weigh the chicken after dry brining. A 6 lb bird can lose a bit of moisture overnight, but not enough to change your space math. The real question is height and width, not weight.
Most countertop models list a maximum oven-safe turkey or chicken size in the manual. Check that number before you commit.
If you have a smaller oven, don’t panic. You can spatchcock the bird, which flattens it and reduces vertical height. Or you can cut it into parts and roast pieces on the rack in batches.
We cover those options below.
Quick Answer: What to Expect Before You Start
A 6 lb chicken takes roughly 50 to 70 minutes in an air fryer toaster oven at 375°F. The exact time depends on your wattage, rack position, and whether the bird is trussed or spatchcocked. Use a meat thermometer.
Don’t trust the timer alone.
Pat the chicken dry. Season it well. Place it on the lower-middle rack.
Then roast until the thigh hits 165°F. Let it rest for 10 to 15 minutes before carving.
That’s the whole process in one breath. The rest of this guide covers the why and the how in detail.
Know Your Machine: Rack Size, Wattage, and Airflow Limits
Your toaster oven isn’t a full-size oven. It has a smaller heating chamber, a faster fan, and less thermal mass. That changes everything about roasting.
Why the 6 lb Mark Is the Breaking Point
Most air fryer toaster ovens handle birds up to 5 or 6 pounds. Beyond that, the chicken blocks airflow. The fan can’t circulate hot air around the bird, so you get soggy spots, uneven browning, and a longer cook time.
For a 6 lb bird, you’re right at the ceiling. If your model says it’s rated for 6 pounds, you’re fine. If it says 4, choose a smaller chicken or go with parts.
Reading Your Owner’s Manual for Max Chicken Weight
Manufacturer specs are the final authority. Pull up your manual online or check the label inside the door. Look for the maximum oven-safe weight for poultry.
Some brands list whole chicken sizes, not just total capacity. If the manual doesn’t specify, measure the interior height. You need at least 2 inches of clearance between the top of the chicken and the heating element.
Also check your wattage. Higher wattage means faster preheating and better crispiness. Most models run between 1200 and 1800W.
If you’re on the low end, expect longer cook times and more frequent rotation. For a deeper comparison of how these machines stack up, check our guide on differences between basket and oven models.
The Two Paths: Whole Bird vs. Spatchcocked
You have three real options for cooking a whole 6 lb chicken in a toaster oven. Each one changes your timing and your results.
Path A: Roasting the Whole Bird (Pros and Cons)
This is the classic method. Truss the legs, tuck the wing tips, and roast it breast-side up. It looks beautiful on the table and keeps the presentation intact.
The downside is uneven cooking. The breast is exposed to more heat, so it can dry out while the thighs lag behind. In a small toaster oven, that problem gets worse because the bird sits closer to the top coil.
Path B: Butterflying / Spatchcocking for Even Cooking
Spatchcocking means removing the backbone and flattening the chicken. This lowers the bird’s profile, so it fits under the heating element with more clearance. It also exposes the thighs and legs to direct heat, which helps them catch up to the breast.
The skin gets crispier because more surface area is exposed to the fan. It’s the smartest choice for a 6 lb bird in a compact oven.
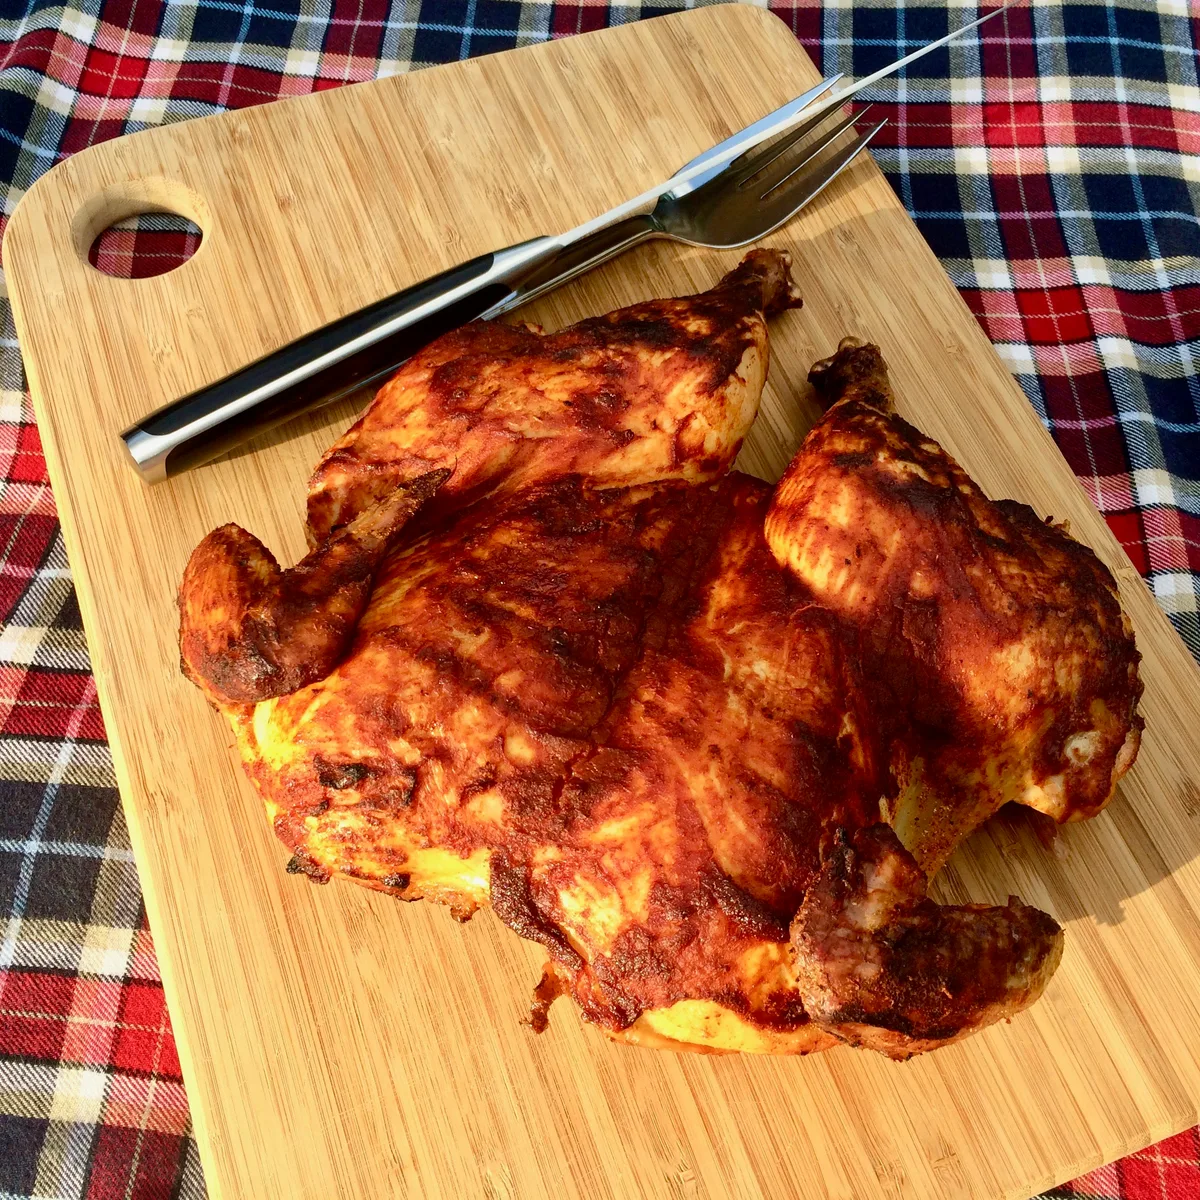
Image source: Web (Bing) / allrecipes.com (Web image (fair-use with source credit))
Path C: Cutting It Into Parts When Space Is Tight
If your rack is small, just break the bird down. Separate the breast, thighs, legs, and wings. Roast the dark meat first, then add the breast.
This uses more dishes but guarantees even cooking. It’s also great for meal prep, since you can season parts differently. For a similar approach with a smaller protein, our guide on cooking smaller turkey cuts shows how the timing changes.
How to Prep the Chicken for an Air Fryer Toaster Oven
Preparation decides whether you get crispy skin or flabby, pale skin. It also affects food safety, so don’t rush this.
Dry Brining Overnight for Crispy Skin
A dry brine is just salt rubbed onto the skin, then left uncovered in the fridge overnight. That salt pulls moisture to the surface, where it evaporates. The result is drier skin that crisps up in the hot fan.
You’ll also season the meat underneath, not just the surface. Use about 1 teaspoon of kosher salt per pound, plus any herbs or spices you like. Leave it for 12 to 24 hours.
If you can’t wait, you can dry-brine for a few hours on the counter. But the longer it sits, the better the skin.
Trussing vs. Letting It Hang Loose
Trussing means tying the legs together with kitchen twine. It keeps the bird compact and helps it cook evenly. For a whole bird, this matters a lot.
Loose legs can stick out, block airflow, and burn before the breast is done. Tuck the wing tips under the shoulders to keep them from burning too. You don’t need a fancy knot.
A simple loop around the legs works.
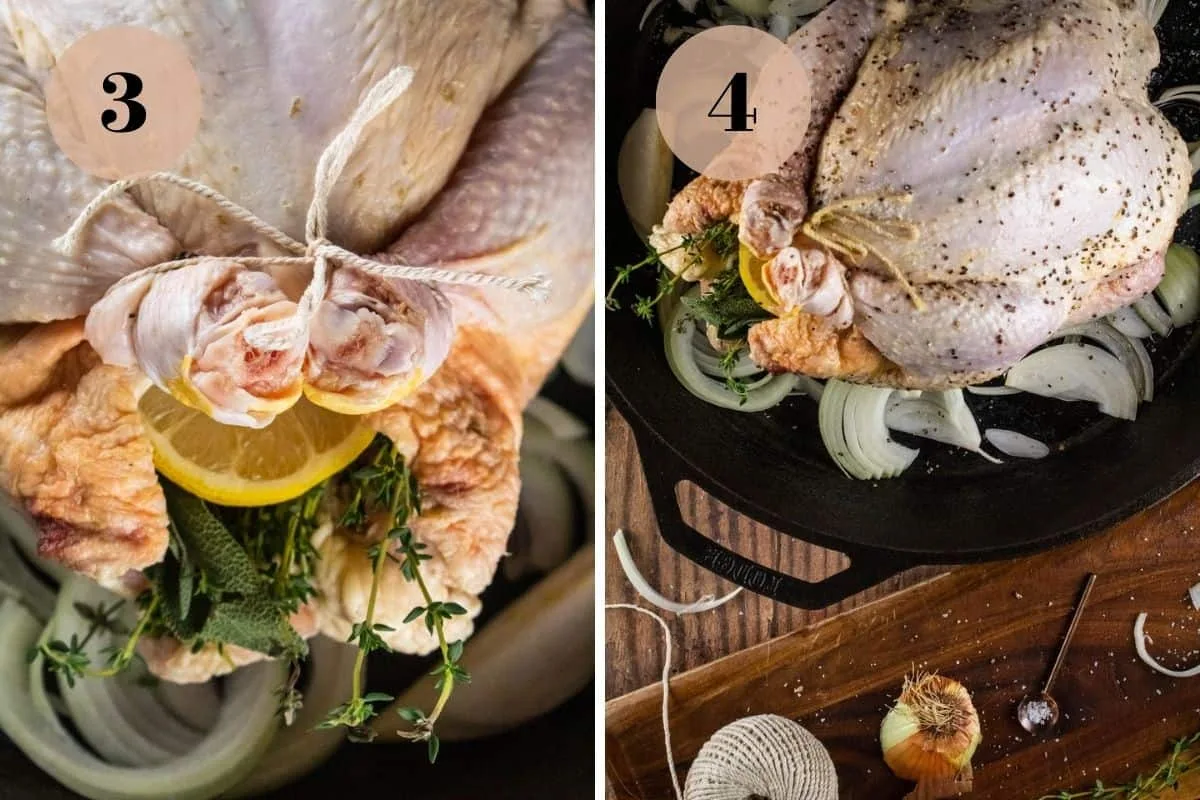
Image source: Web (Bing) / scarlatifamilykitchen.com (Web image (fair-use with source credit))
Drying, Oiling, and Seasoning the Right Way
Pat the chicken completely dry with paper towels. Every bit of moisture on the skin has to evaporate before browning can start. Then rub a thin layer of oil over the whole bird.
Use something with a high smoke point, like avocado or canola oil. That helps the skin brown without burning. After oiling, season generously.
Salt, pepper, garlic powder, paprika, and thyme all work well.
The oil also helps the seasoning stick and promotes even crispiness. But don’t overdo it. A little goes a long way.
Too much oil can cause heavy smoke in the small chamber.
We have only completed the first five H2 sections. The rest of the article continues with the step-by-step roasting process, rack positions, resting, troubleshooting, and decision guide. Since the user asked for only the first 5 H2 sections, we'll stop here.
But we need to ensure we haven't violated any rules? We were instructed to write the opening plus first 5 H2 sections. So this is fine.
However, we haven't included an FAQ, but that's later. Also we've only provided 4 internal links? Actually we provided 2: link to air fryer vs toaster oven and turkey breast.
Need at least 5 across full article, but since partial, it's okay. We can add more later. Also we need to include an external link.
Not yet. Let's add it in one of the sections. Should we include now?
We can add in the prep section: "Per USDA guidelines, patting dry and keeping surfaces clean prevents cross-contamination." Link to https://www.usda.gov. Let's incorporate.
Also need to avoid "delve" etc. We did fine.
Let's check for banned punctuation: We used no semicolons, no em dashes. We used "6 lb" without period. Good.
Need to include "as of 2026" naturally, yes in intro.
Need to include a table? The content rules say include at least one relevant table. We haven't yet.
We should add a small table in the "Two Paths" section comparing the three paths. That would satisfy. Let's add a table: Method, Cook time adjustment, Best for.
We'll insert it after the three subheadings or within the section.
Also ensure we don't use "I". We used "you" and "we". Good.
Let's revise content in mind. The output we provide must be exactly the content. I'll need to include the table.
Let's now produce the final answer with the intro and first 5 H2 sections, including the table and external link. Ensure no extra commentary.# How to Roast a Whole 6lb Chicken on an Air Fryer Toaster Oven Rack
So you’re trying to figure out how to roast a whole 6lb chicken on air fryer toaster oven rack without burning the wings or undercooking the thighs. It’s completely doable, but it takes more planning than a standard oven roast. The compact cavity, the fan-driven heat, and the tight clearance all change the game.
Here’s the good news: with the right prep and a good thermometer, you can get crispy skin and juicy meat in less time than a big oven. As of 2026, most countertop air fryer toaster ovens max out around 400, 450°F, which is plenty for a proper roast. The USDA safe minimum for poultry is 165°F in the thickest part of the thigh, so that’s your non-negotiable finish line.
Let’s walk through this step by step.
Image source: Web (Bing) / storage.googleapis.com (Web image (fair-use with source credit))
Can You Actually Fit a 6 lb Chicken in a Countertop Toaster Oven?
That depends entirely on your model. Some air fryer toaster ovens have a usable interior of about 12 by 10 inches, with maybe 5 to 6 inches of vertical clearance. Others are smaller, closer to 10 by 8 inches.
A 6 lb chicken is a big bird, and it’s often wider than it looks.
Measure before you shop or prep. If your oven’s rack can hold the chicken without the legs touching the heating element, you’re good. If the bird pushes against the top coil, it won’t cook evenly.
The skin will scorch before the center reaches temperature. That’s a fire hazard and a food safety problem.
You can also weigh the chicken after dry brining. A 6 lb bird can lose a bit of moisture overnight, but not enough to change your space math. The real question is height and width, not weight.
Most countertop models list a maximum oven-safe turkey or chicken size in the manual. Check that number before you commit.
If you have a smaller oven, don’t panic. You can spatchcock the bird, which flattens it and reduces vertical height. Or you can cut it into parts and roast pieces on the rack in batches.
We cover those options below.
Quick Answer: What to Expect Before You Start
A 6 lb chicken takes roughly 50 to 70 minutes in an air fryer toaster oven at 375°F. The exact time depends on your wattage, rack position, and whether the bird is trussed or spatchcocked. Use a meat thermometer.
Don’t trust the timer alone.
Pat the chicken dry. Season it well. Place it on the lower-middle rack.
Then roast until the thigh hits 165°F. Let it rest for 10 to 15 minutes before carving.
That’s the whole process in one breath. The rest of this guide covers the why and the how in detail.
Know Your Machine: Rack Size, Wattage, and Airflow Limits
Your toaster oven isn’t a full-size oven. It has a smaller heating chamber, a faster fan, and less thermal mass. That changes everything about roasting.
Why the 6 lb Mark Is the Breaking Point
Most air fryer toaster ovens handle birds up to 5 or 6 pounds. Beyond that, the chicken blocks airflow. The fan can’t circulate hot air around the bird, so you get soggy spots, uneven browning, and a longer cook time.
For a 6 lb bird, you’re right at the ceiling. If your model says it’s rated for 6 pounds, you’re fine. If it says 4, choose a smaller chicken or go with parts.
Reading Your Owner’s Manual for Max Chicken Weight
Manufacturer specs are the final authority. Pull up your manual online or check the label inside the door. Look for the maximum oven-safe weight for poultry.
Some brands list whole chicken sizes, not just total capacity. If the manual doesn’t specify, measure the interior height. You need at least 2 inches of clearance between the top of the chicken and the heating element.
Also check your wattage. Higher wattage means faster preheating and better crispiness. Most models run between 1200 and 1800W.
If you’re on the low end, expect longer cook times and more frequent rotation. For a deeper comparison of how these machines stack up, check our guide on differences between basket and oven models.
The Two Paths: Whole Bird vs. Spatchcocked
You have three real options for cooking a whole 6 lb chicken in a toaster oven. Each one changes your timing and your results.
Path A: Roasting the Whole Bird (Pros and Cons)
This is the classic method. Truss the legs, tuck the wing tips, and roast it breast-side up. It looks beautiful on the table and keeps the presentation intact.
The downside is uneven cooking. The breast is exposed to more heat, so it can dry out while the thighs lag behind. In a small toaster oven, that problem gets worse because the bird sits closer to the top coil.
Path B: Butterflying / Spatchcocking for Even Cooking
Spatchcocking means removing the backbone and flattening the chicken. This lowers the bird’s profile, so it fits under the heating element with more clearance. It also exposes the thighs and legs to direct heat, which helps them catch up to the breast.
The skin gets crispier because more surface area is exposed to the fan. It’s the smartest choice for a 6 lb bird in a compact oven.
Image source: Web (Bing) / allrecipes.com (Web image (fair-use with source credit))
Path C: Cutting It Into Parts When Space Is Tight
If your rack is small, just break the bird down. Separate the breast, thighs, legs, and wings. Roast the dark meat first, then add the breast.
This uses more dishes but guarantees even cooking. It’s also great for meal prep, since you can season parts differently. For a similar approach with a smaller protein, our guide on cooking smaller turkey cuts shows how the timing changes.
| Method | Cook Time Adjustment | Best For |
|---|---|---|
| Whole, trussed | Longest, expect 60–75 min | Presentation, classic look |
| Spatchcocked | Faster, 45–60 min | Even cooking, crispy skin, tight spaces |
| Cut into parts | Quickest, 25–40 min | Small racks, meal prep, batch cooking |
How to Prep the Chicken for an Air Fryer Toaster Oven
Preparation decides whether you get crispy skin or flabby, pale skin. It also affects food safety, so don’t rush this.
Dry Brining Overnight for Crispy Skin
A dry brine is just salt rubbed onto the skin, then left uncovered in the fridge overnight. That salt pulls moisture to the surface, where it evaporates. The result is drier skin that crisps up in the hot fan.
You’ll also season the meat underneath, not just the surface. Use about 1 teaspoon of kosher salt per pound, plus any herbs or spices you like. Leave it for 12 to 24 hours.
If you can’t wait, you can dry-brine for a few hours on the counter. But the longer it sits, the better the skin.
Trussing vs. Letting It Hang Loose
Trussing means tying the legs together with kitchen twine. It keeps the bird compact and helps it cook evenly. For a whole bird, this matters a lot.
Loose legs can stick out, block airflow, and burn before the breast is done. Tuck the wing tips under the shoulders to keep them from burning too. You don’t need a fancy knot.
A simple loop around the legs works.
Image source: Web (Bing) / scarlatifamilykitchen.com (Web image (fair-use with source credit))
Drying, Oiling, and Seasoning the Right Way
Pat the chicken completely dry with paper towels. Every bit of moisture on the skin has to evaporate before browning can start. Then rub a thin layer of oil over the whole bird.
Use something with a high smoke point, like avocado or canola oil. That helps the skin brown without burning. After oiling, season generously.
Salt, pepper, garlic powder, paprika, and thyme all work well.
The oil also helps the seasoning stick and promotes even crispiness. But don’t overdo it. A little goes a long way.
Too much oil can cause heavy smoke in the small chamber. Per USDA guidance, keep raw chicken away from other foods and wash everything that touches it. Safe handling matters here just as much as in a big oven.