
If you've ever wondered how to proof bread dough in an air fryer toaster oven, you're in the right place. This is one of the smartest ways to keep dough at a steady temperature on a cold day. But you can't just hit "warm" and walk away.
The convection fan changes the game, and so does the minimum temperature on your machine.
In our research, most yeast doughs need a stable spot between 75°F and 90°F. Some air fryer toaster ovens have a proofing preset that nails that range. Others bottom out around 100°F, which means you need a small workaround.
Let's walk through it.
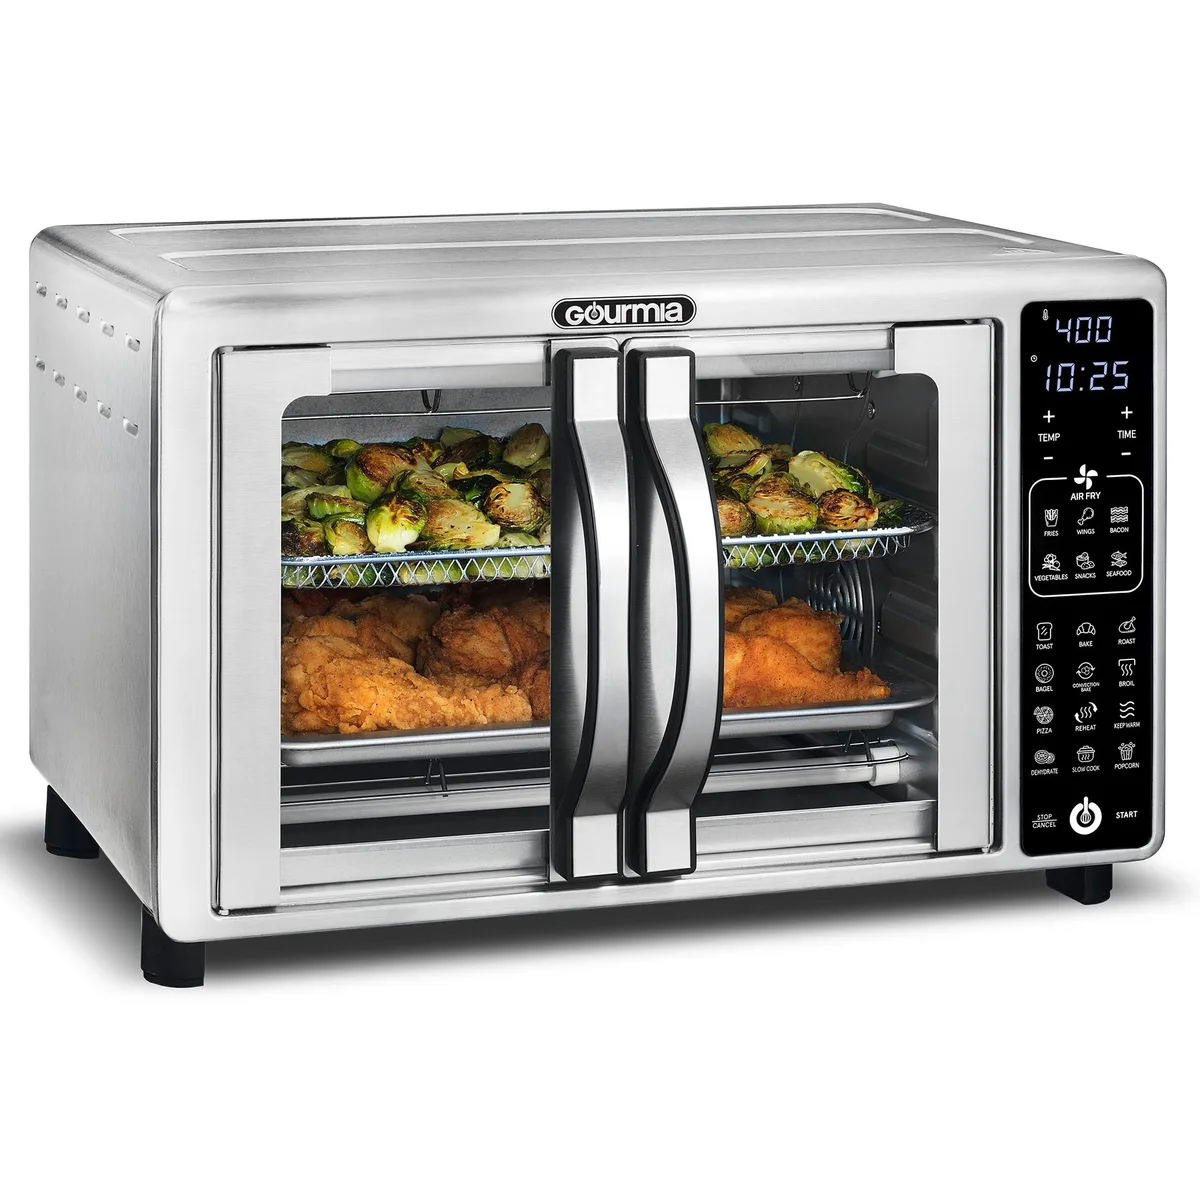
Image source: Web (Bing) / storage.googleapis.com (Web image (fair-use with source credit))
Quick Answer: Does Your Air Fryer Toaster Oven Actually Have a Proofing Setting?
Most air fryer toaster ovens can proof bread dough. Use the proof preset if your model has one. If it doesn't, set the lowest temperature and cover the bowl.
Keep the dough between 75°F and 90°F. As of 2026, many models make this workable. Just don't trust the dial without checking.
Why Proofing in an Air Fryer Toaster Oven Is Tricky (and Worth It)
Here's what makes it different. An air fryer toaster oven is a small convection oven, not a dedicated proofing drawer. The fan pushes warm air around the interior, which is great for crispy food but tough on exposed dough.
It pulls moisture off the surface fast, so a covered bowl is non-negotiable.
Even with that catch, it's worth solving. A door-style toaster oven model can hold a stable temperature without heating your whole kitchen. You get a consistent rise for pizza dough, sandwich bread, or cinnamon rolls in about half the time they'd take on a cold counter.
If you're comparing basket fryers to door-style toaster ovens, the extra interior room is why bread bakes work at all.
What Temperature Does Bread Dough Really Need to Rise?
Yeast is fussy but predictable. At the right temperature, it produces carbon dioxide and the dough stretches. Too hot, and you kill the microbes.
Too cold, and you wait forever.
Here's what the numbers look like:
| Dough temperature | What happens | | Below 60°F | Rise is slow. Dough may develop a sour tang. | | 75°F to 90°F | The sweet spot. Steady rise, good flavor. | | Above 110°F | Yeast activity suffers. Above 120°F, it can die. |
Most recipes aim for the middle band. The same range works for the first rise and the final proof. That's why an air fryer toaster oven set to a proof preset is so useful.
It keeps that band steady.
A convection fan makes the air move, which is exactly why these machines preheat so quickly. The same heat distribution that makes convection ovens so efficient also means you need to watch for hot spots.
Don't trust the display blindly. Your oven's actual temperature can drift, especially near the heating elements. Use an instant-read thermometer to check the air beside the dough, not just the dial.
You'll find the same target range in land-grant university extension guides for home bakers.
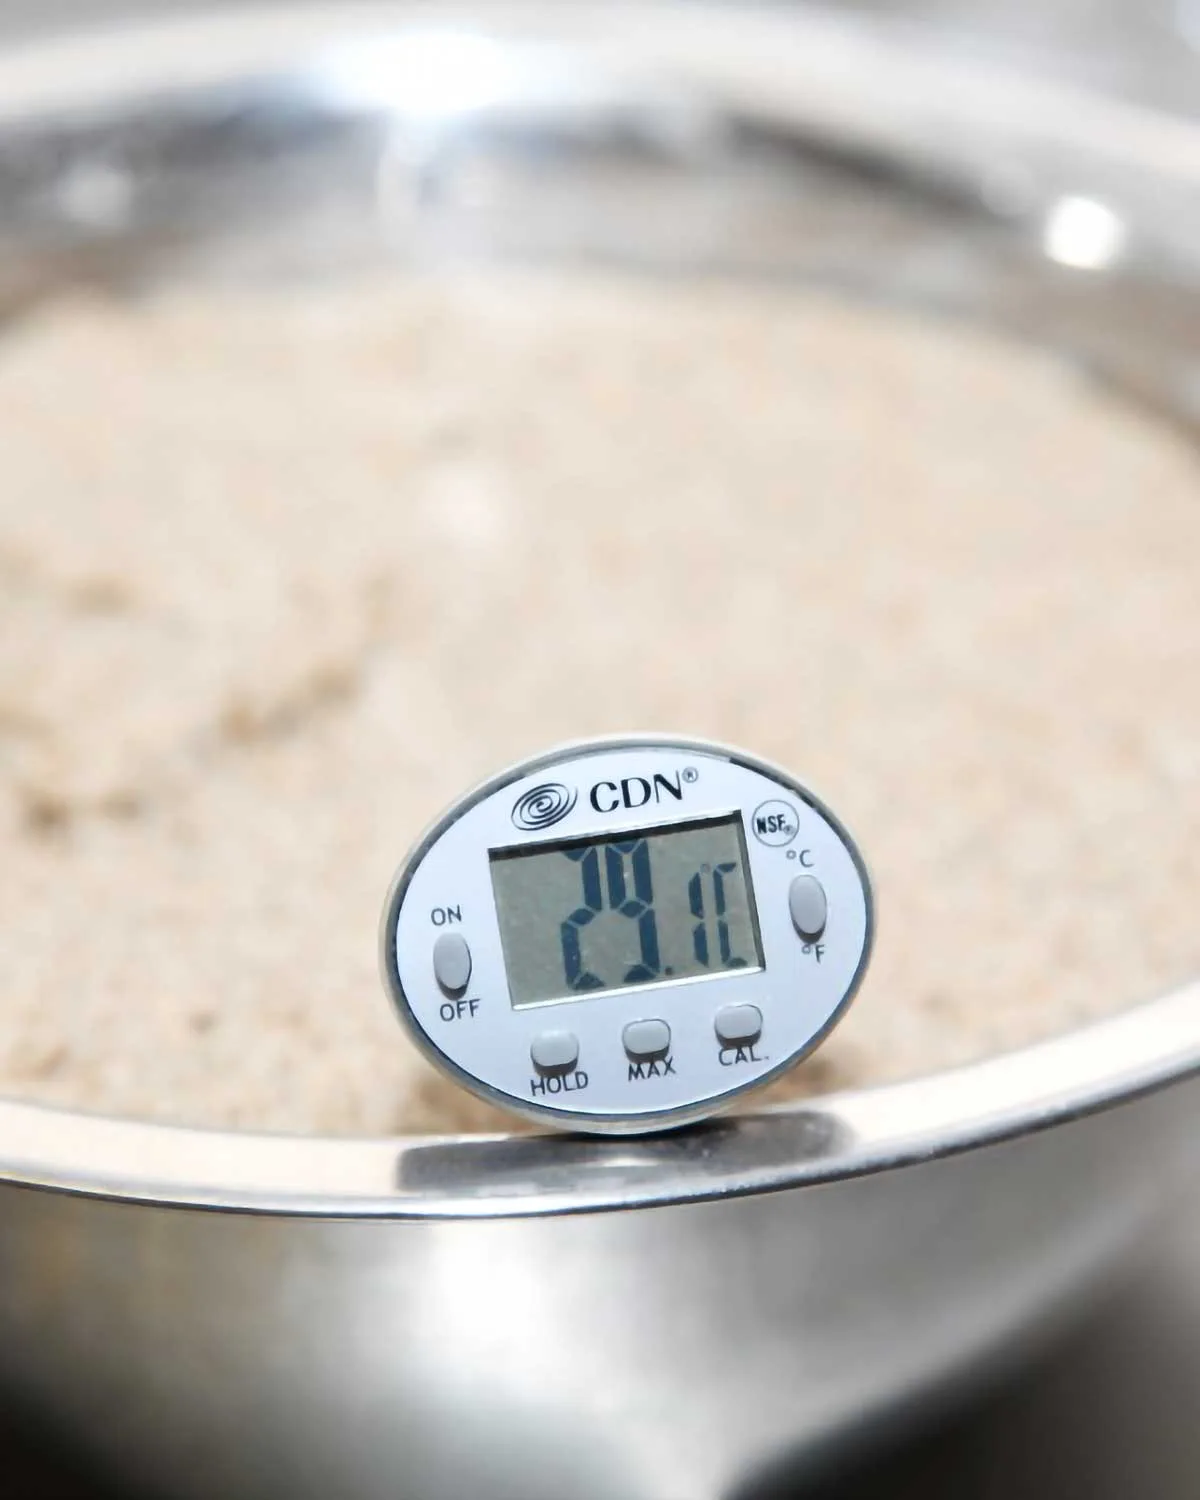
Image source: Web (Bing) / leitesculinaria.com (Web image (fair-use with source credit))
First Decision: Does Your Machine Have a "Proof" Button?
Open the door and look at the controls. A dedicated proofing mode is usually labelled "Proof" or "Dough." On some machines, it lives inside a slow-cook or dehydrate program. Manufacturer specifications indicate that the Breville Smart Oven Air, Ninja Foodi Flip, and Instant Omni all include a dedicated preset.
If yours has one, you are 80 percent there. Press the button, set the timer, and place your covered bowl in the center. The power draw at proofing temperature is low, so you don't need to babysit your electric bill.
You still need the thermometer. Aggregate reviews report these presets sometimes run hot, so verify what the oven actually holds.
If yours doesn't have one, skip ahead to the next decision. Manual proofing takes a bit more attention, but it works with almost any machine.
Second Decision: Can You Set a Low Temperature Manually?
If there is no proof button, your next move is simple. Check whether the temperature control goes low enough. The ideal range is 75°F to 90°F.
Some models let you set 80°F by hand. Most bottom out at 100°F or 120°F.
Here is the practical rule: the warmer the oven, the shorter the proof. At 100°F, the dough will still rise, but you need to watch it closely. Set a timer for 25 to 30 minutes and check the dough's progress.
A tightly covered bowl protects against the fan's drying effect.
Think about how your machine preheats. If you've noticed how aggressively your toaster oven preheats for toast, you already know the temperature can spike before settling. The same thing happens on the lowest setting, so give the oven a few minutes to settle before adding your dough.
Here's a quick cheat sheet:
| Lowest temperature | Your game plan | | 80°F to 90°F | Set it and forget it. Check around 45 minutes. | | 100°F | Proof in 30-minute bursts. Keep the bowl covered. | | 120°F or higher | Don't use it. Wait for the oven to cool or proof on the counter. |
So what about a machine that only reaches 120°F? Skip it. Yeast starts struggling around 110°F, so anything above that just ruins the dough.
If your machine only goes to 120°F, turn it off and let it cool for a few minutes before you put the dough in. You can also add a small pan of hot water on the rack below the bowl to help soften the heat.
The even warmth that helps biscuits bake up crisp in these ovens works in your favor here too. You just have to manage the time instead of letting the preset do it for you.
Third Decision: Should You Run the Convection Fan on Low Speed?
The fan is your biggest variable in an air fryer toaster oven. Some machines only use high-speed air frying, which is far too strong for bread dough. Others switch to a slow, gentle airflow during proofing.
If your model has a dedicated proof preset, it usually runs the fan at low speed or cycles it off. This is ideal. The moving air warms the chamber evenly without attacking the dough surface.
If you're setting the temperature manually, look for a "convection" or "bake" option rather than "air fry." Air fry mode pushes intense airflow, and it will dry out the dough's skin within minutes. A covered bowl can still work, but you'll need a tight seal.
Don't panic if you can't turn the fan off. Thousands of bakers proof successfully with it running. You'll just need to protect the dough more carefully, and that's exactly what the next step covers.
Step-by-Step: How to Proof Bread Dough in an Air Fryer Toaster Oven
Follow these steps for a smooth rise. This works for your first or second proof, as long as you keep the dough covered.
- Shape your dough and place it in a lightly greased bowl or loaf pan.
- Cover the bowl with a damp kitchen towel or greased plastic wrap. Make sure the cover doesn't touch the heating elements.
- Place the covered bowl on the middle rack.
- Select the proof preset if you have one. If not, set the lowest temperature option.
- Fill an oven-safe cup or small pan with hot water and set it on the bottom rack. This adds moisture.
- Set a timer for 30 to 45 minutes. Check the dough at the halfway mark.
- Use the finger poke test to decide when it's ready.
The covered bowl is crucial. A damp towel lets some moisture through while keeping the top from forming a dry skin.
Image source: Bing (Web (fair-use with source credit))
A pro tip: rotate the bowl once halfway through the proof. Some ovens have hot spots near the back where the fan and element sit. A quick half-turn evens out the rise.
If you're proofing in a loaf pan, use greased plastic wrap instead of just a towel. It touches the dough surface directly, so you need a barrier that won't stick as the dough climbs upward.
How to Keep Dough Moist When the Fan Is Running
A convection fan creates a breeze that strips moisture from anything exposed. Your dough's surface is the first casualty. You'll see cracked, dried patches and a tacky skin that ruins the final loaf or rolls.
The fix is simple. Air always moves, but moisture stays put when you trap it. Use a cover that seals completely.
Here's the breakdown:
| Cover type | Best for | Watch out | | Greased plastic wrap | Loaf pans and shaped dough | Make sure it's sealed and not tight over the dough | | Damp towel | Bowl rises and bulk fermentation | Check that it doesn't dry out | | Loose foil | When you need an even cover | Crimp the edges to hold in steam |
Add the pan of hot water to the bottom rack. It fills the enclosed oven with gentle humidity, which helps yeast stay active. Many bakers skip this and still get a good rise, but the water makes the dough softer and more forgiving.
How to Tell When Dough Is Ready: The Finger Poke Test
Forget the timer. The dough tells you when it's done. Poke it lightly with a floured finger, about half an inch deep.
If the indentation springs back slowly, leaving a small dent, the dough is proofed and ready to bake. This is your "perfect proof" window.
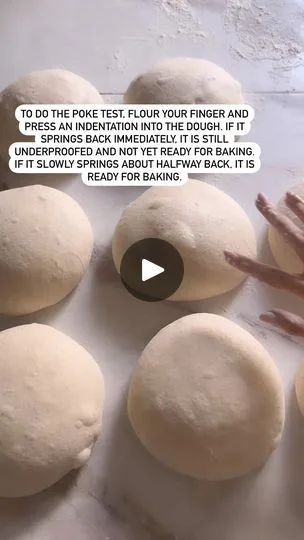
Image source: Web (Bing) / ph.pinterest.com (Web image (fair-use with source credit))
If it springs back quickly and the dent vanishes, give it another 10 to 15 minutes. If the dough doesn't spring back at all and the fingerprint stays deep, it's overproofed. It'll collapse when baked, so punch it down, reshape, and proof again.
Your temperature affects the timing. At 80°F, dough doubles in about 45 to 60 minutes. At 95°F, it might be ready in 30.
At 100°F, check every 10 minutes to avoid overproofing.
What If Your Oven Runs Too Hot? Cooling a Heat-Heavy Toaster Oven
Some air fryer toaster ovens don't hold a gentle 80°F, even on the lowest setting. They spike to 100°F or higher and stay there. If your thermometer reads over 110°F, your yeast is in danger.
Here's your quick fix. Let the oven heat up for 5 minutes, then turn it off. Place the covered dough inside with the door mostly closed, leaving a small gap.
The residual warmth and steam will hold the temperature around 80°F to 85°F for up to an hour.
You can also use the "cooling" trick. Wait until the oven shuts off, cracked open, for 2 to 3 minutes before loading your dough. A quick reading with your digital thermometer will confirm the air is in range.
Some models have a smart algorithm for proofing. They heat briefly, rest, and reheat to keep the chamber stable. That's why their presets work so well.
Manual settings are more crude, so the heat cycles are longer and less predictable.
If your oven keeps running hot even with these tricks, skip the toaster oven for proofing. Move to a cold counter or use a large microwave with a cup of hot water. A bad proof ruins the dough, and the toaster oven isn't worth the loss.
Common Proofing Problems and How to Fix Them
A few things go wrong regularly. Each has a simple fix.
| Problem | What's happening | The fix | | Dough won't rise | Oven temperature too low | Check with a thermometer; bump up 5°F | | Dough rises too fast | Oven too warm | Turn off the oven and proof with residual heat | | Dry, cracked skin | Fan exposed the dough | Use greased plastic wrap or a damp towel | | Dense, soupy texture | Overproofed dough | Punch down, reshape, and re-proof at a cooler temperature | | Dough sticks to the towel | Towel dried onto the surface | Switch to plastic wrap or lightly flour the towel |
If the dough still hasn't moved after 60 minutes, check your yeast. Old yeast is the most common cause of a stalled rise. Proof a spoonful in warm water with a pinch of sugar before you commit to the oven.
Alternatives: When to Just Proof on the Counter Instead
An air fryer toaster oven isn't always the right tool. If the room is already 75°F, a countertop rise works fine. You don't need to warm the oven at all.
If your machine only goes down to 120°F or higher, skip it. Yeast begins to struggle above 110°F, so using the machine will hurt the dough. The same applies if you have a small basket-style fryer with no room for a loaf pan.
There's also the microwave method. Boil a cup of water, place it beside the covered dough, and close the door. The steam creates a warm, humid environment that works beautifully.
Check the temperature with a thermometer to make sure it stays under 90°F.
And sometimes the rest of your meal is already in the toaster oven. If you're making croutons or baking frozen burritos, just set the dough on a sunny counter. Most doughs do fine with a slow rise.
Pro Tips for a Better Rise and Deeper Flavor
You can improve the final loaf with small tweaks. A slower rise at a slightly cooler temperature produces more complex flavors. If your toaster oven holds around 75°F, that's actually ideal for artisan-style bread.
Reduce the yeast slightly when using a proof setting. The controlled warmth means you don't need a big yeast population to get a good rise. Half a teaspoon less won't hurt, but it will slow things down enough to build flavor.
Use steam for the final proof. The hot water pan we mentioned earlier isn't optional for wet doughs like focaccia or ciabatta. It keeps the top moist, so the dough can stretch evenly instead of tearing.
Always preheat the oven before loading your dough. Even a proof setting needs a few minutes to settle. Cold dough hit with a sudden blast of heat can collapse, so give it a gentle transition.
The same toaster oven that makes quick toast is a precision machine at low temperatures. Listen to the fan, trust the thermometer, and you'll get a consistent rise every time.
Frequently Asked Questions
Can I proof bread dough in any air fryer toaster oven?
Most models work, but only if you can control the temperature. A proof preset or a low setting near 80°F is best. Machines that only reach 120°F need the cooling-off trick or a different proofing spot entirely.
Should I cover the dough while proofing in an air fryer toaster oven?
Yes. Always cover the dough with greased plastic wrap or a damp towel. The convection fan dries out exposed surfaces quickly.
A covered bowl also keeps the dough at a consistent temperature and humidity.
How long does dough take to rise in an air fryer toaster oven?
It depends on the temperature. At 80°F, plan for 45 to 60 minutes. At 95°F, the dough might double in 30 to 40 minutes.
Check at regular intervals and rely on the finger poke test, not the clock.
What if my air fryer toaster oven doesn't have a proof setting?
Set the lowest temperature manually and watch it with a thermometer. If the lowest setting is still too hot, turn the oven off after preheating. The residual heat inside the chamber will hold a gentle proofing environment for about an hour.
Is proofing in an air fryer toaster oven faster than room temperature?
Usually, yes. The enclosed oven keeps warmth around the dough without cold drafts. On a cold day, a toaster oven proofing setup can cut rise time almost in half compared to a drafty counter.
Just don't speed it up too much or the dough will lose flavor.