
Making beef jerky at home always sounds like it requires a dedicated dehydrator, a crowded gadget shelf, or another appliance you don't have room for. But here's the truth: you can learn how to make beef jerky using dehydrate mode in toaster oven, and the results are legitimately good. It isn't complicated, but it's unforgiving in ways most tutorials gloss over.
Drying meat is food preservation. Get it wrong and your jerky can spoil, mold, or make someone sick. That's why the USDA FSIS recommends an internal temperature of 160°F (71°C) before the drying phase finishes.
This safety threshold shapes everything about the process, from how you prep the meat to how you confirm it's done. Let's dig into the details.
Quick Answer
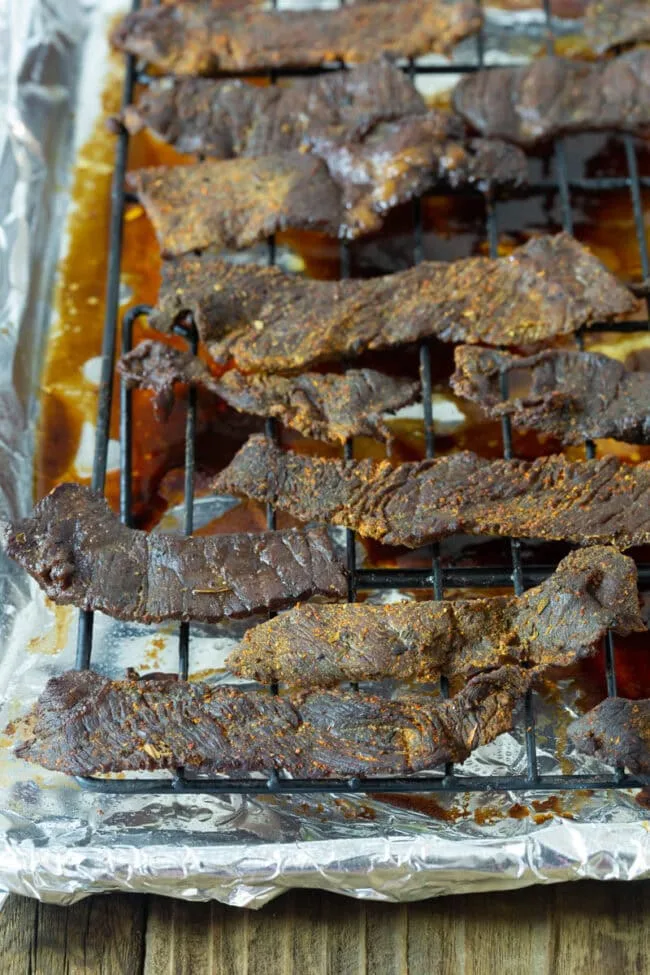
Slice beef thin and marinate overnight. Arrange strips in a single layer on a wire rack. Set dehydrate mode to 160°F (71°C).
Dry for 3 to 6 hours until jerky bends and cracks without snapping. Always confirm the internal temperature hit 160°F.
Why Making Jerky in a Toaster Oven Requires Real Care
Most people assume the dehydrate button is a magic setting. Push it, walk away, come back to jerky. That mental model is exactly where things go wrong.
The danger zone for bacterial growth sits between 40°F and 140°F. Dehydrate mode hovers right near that ceiling, usually at 150°F to 170°F. If your particular toaster oven runs cool, which aggregate owner feedback suggests is common at low temp settings, your meat can sit in the danger zone for too long.
That's when pathogens like E. coli and Salmonella get a chance to multiply.
Per USDA FSIS guidance, beef jerky must reach 160°F internally before the drying cycle is complete. At that temperature, pathogens are eliminated. The dehydration then drops the moisture low enough to prevent re-growth.
As of 2026, more toaster ovens include calibrated dehydrate modes with tighter thermostat systems. But you still shouldn't trust the digital readout. Verify it.
Not every toaster oven handles low-temp cycles the same way. Understanding your countertop oven options before you commit is worth a few minutes.
How Toaster Oven Dehydrate Mode Actually Works
When you switch to dehydrate mode, the heating element cycles at a low output while the convection fan runs continuously. That fan pushes warm, dry air across the surface of the meat. The air picks up moisture as it passes and carries it out through the vent.
That constant airflow is what actually dries the meat. Without it, you're just slow-cooking beef in a warm box.
The tricky part is that not every toaster oven does this well. Some models run the fan at limited speeds, and others don't run the fan at all in dehydrate mode. Check your manual before the first batch.
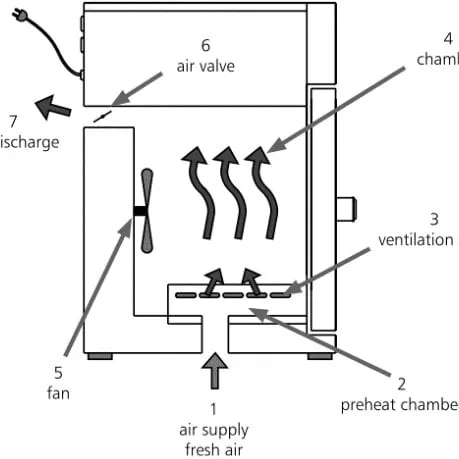
The airflow pattern matters more than the exact temperature setting. If you want to understand why, the mechanics of fan-driven cooking will make the whole process click.
The Only Beef Cuts You Should Use (and Why Fat Is the Enemy)
Beef jerky starts with beef, and not all beef is suitable for jerky. The leanest cuts work best, so pick a cut like top round, eye of round, or sirloin.
The reason comes down to safety. Fat doesn't dehydrate. It stays pliable, retains moisture, and can turn rancid during storage.
Eating a greasy batch of jerky isn't just unappetizing, it's a food-safety problem.
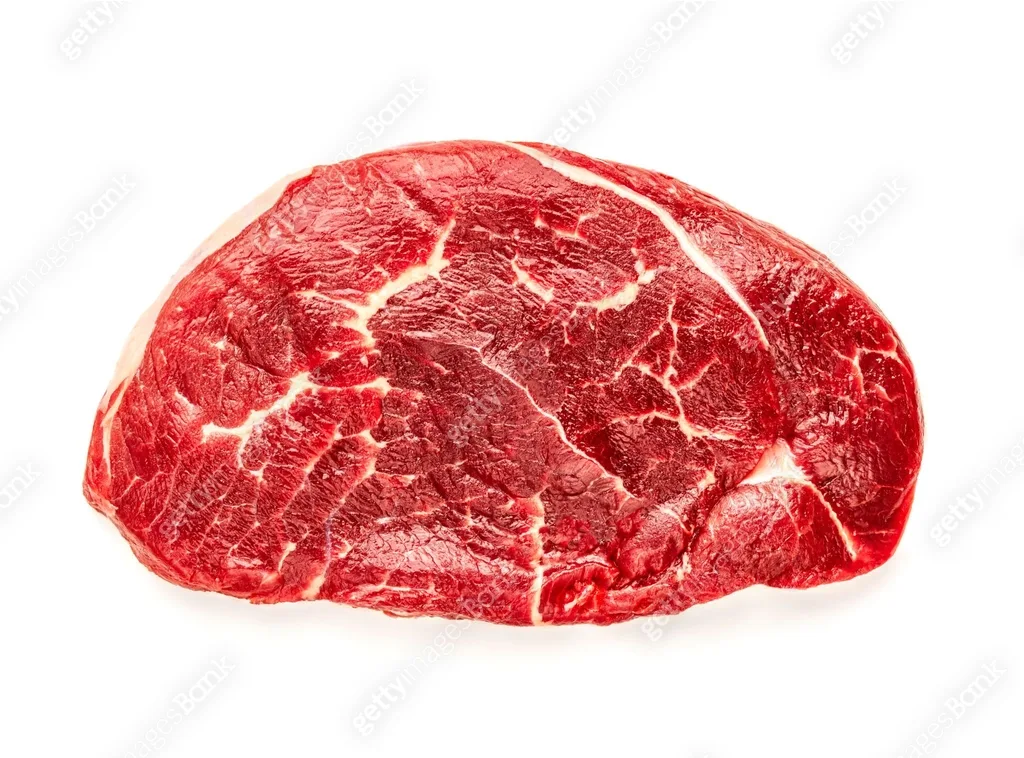
What to look for at the meat counter:
- Eye of round: the classic jerky choice
- Top round: nearly as lean, often cheaper
- Sirloin: slightly more tender, costs more per pound
- Flank steak: works, though usually pricey for this job
Whatever you buy, trim away any visible fat before slicing. Those white patches in the muscle, get rid of them. The effort pays off in both safety and texture.
Essential Tools: Racks, Thermometers, and Safety Basics
You don't need a commercial kitchen to make great jerky. The tool list is short:
| Tool | Why You Need It |
|---|---|
| Wire roasting rack | Allows airflow under and around every strip |
| Drip pan or baking tray | Catches drips and keeps the oven clean |
| Instant-read thermometer | Confirms the 160°F internal temperature |
| Kitchen timer | Tracks the 3 to 6 hour drying window |
| Sharp knife or slicer | Produces consistent thin strips |
The thermometer matters more than any other tool on this list. Relying on the oven display alone is risky, and it's the most common reason a batch dries too slowly or finishes with undercooked centers.
If you run long dehydrate cycles regularly, it helps to know how much power these appliances draw. The cost is small per batch, but it adds up over a year of jerky making.
The Complete Step-by-Step Jerky Process (Prep to Finish)
Now the main event. Follow these steps in order, and you'll end up with jerky that's safe, chewy, and better than anything from a convenience store.
Step 1: Trim and partially freeze
Start with a lean cut. Trim any visible fat. Pop the meat into the freezer for about 30 to 45 minutes until it's firm but not frozen solid.
This makes slicing thin, even strips much easier.
Step 2: Slice
Slice with the grain for a tougher, stringier jerky that pulls apart like traditional cowboy jerky. Slice against the grain for a more tender bite that snaps cleanly. Aim for 1/8 to 1/4 inch thick.
Even thickness is the key to even drying.
Step 3: Marinate (6 to 24 hours)
Combine soy sauce, Worcestershire sauce, brown sugar, black pepper, garlic powder, and a few drops of liquid smoke if you like that classic smokey flavor. Submerge the meat in the marinade and refrigerate. Let it sit at least 6 hours but no more than 24.
Longer doesn't mean better, it just means saltier.
While the marinade does its job, keep in mind the same dehydrate function can handle dehydrating other foods around the kitchen. It's a versatile setting when you know how to use it.
Step 4: Drain and pat dry
Pull the strips out of the marinade. Let the excess drip off, then pat each strip dry with a paper towel. Wet strips take longer to dry, and surface moisture can steam the meat early in the cycle.
Step 5: Arrange on the rack
Lay strips flat in a single layer. Leave at least a finger's width of space between them, so air flows around every piece. Overlapping strips trap moisture and dry unevenly.
Step 6: Dry
Preheat the toaster oven to 160°F (71°C) using dehydrate mode. Place the rack in the oven with a drip pan underneath. Dehydrate for 3 to 6 hours.
At the one-hour mark, check the internal temperature of a thick strip with your instant-read thermometer. It needs to hit 160°F. After that, keep drying until the texture is right.
Step 7: Cool, test, and condition
Remove the jerky and let it cool completely. Take one strip and bend it. It should flex and crack on the surface without snapping in half.
If it snaps, you've dried it too long. If it feels spongy or damp, give it another hour.
Once cooled, pack the jerky into a jar with the lid slightly open. Condition for 24 hours. If you see condensation inside the jar, your jerky is still too wet.
Pop it back into the oven for another stretch at the same temperature.
How to Tell When It's Done: Bend, Crack, and Internal Temperature
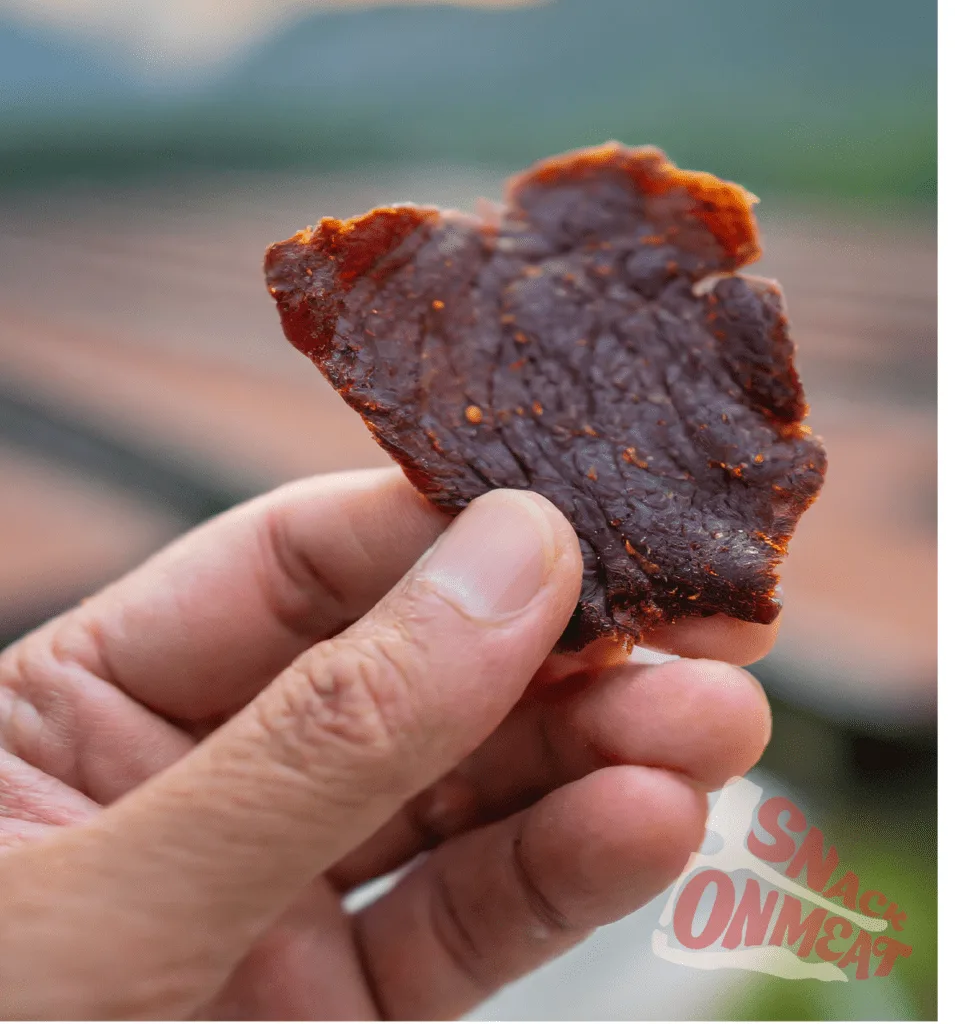
The bend test is the closest thing to a universal jerky checklist. Take a strip from the rack, let it cool for a minute, and then bend it gently. A properly dried piece flexes like a soft twig, with small white cracks on the surface but no break.
If the strip snaps in half, it's over-dried. It will still taste okay, but the texture will be brittle and closer to a beef shard. If it bends like a rubber band and feels springy, it needs more time.
Internal temperature is the safety floor, not the finish line. The meat must hit 160°F (71°C) to kill bacteria, but that can happen within the first hour. The rest of the drying time is about texture.
Check both signals, not just one.
Remember that jerky firms up as it cools. A strip that seems slightly soft out of the oven will tighten after ten minutes. Give it a second test after cooling before you call it done.
Non-Negotiable Food Safety Rules for Drying Meat
Drying is not the same as cooking. Warm air removes moisture, but it also gives bacteria a comfortable window to multiply if you skip safety steps. That's why you treat raw beef like you would for any kitchen task.
Wash your hands, knives, cutting boards, and countertops with hot soapy water after handling raw meat. Never let the marinade touch cooked jerky unless you boil it first. The same rule applies if you're planning to reuse the marinade as a dipping sauce: bring it to a rolling boil for several minutes.
Keep the meat refrigerated during marination. Even a short soak at room temperature invites trouble, and the bacteria in the marinade multiply quickly as the liquid warms. You can safely marinate for up to 24 hours in the fridge.
Beyond that, the texture degrades and the salt content climbs.
If you like thick-cut jerky or plan to store it for months, consider using curing salt number one (also called pink salt). It's not required, but it adds a protective layer against botulism and other anaerobic bacteria. Use it sparingly and follow the exact weight-based instructions on the package.
Common Mistakes That Wreck Texture or Cause Spoilage
Most jerky failures trace back to a handful of predictable errors. Fix these and your batches will improve dramatically.
- Skipping the fat trim. Fat turns rancid and shortens shelf life.
- Slicing unevenly. Thin strips burn, thick strips stay soggy.
- Overcrowding the rack. Overlapping pieces trap steam and dry slowly.
- Opening the oven door too often. Every open door drops the temperature and adds humidity.
- Trusting the timer instead of the bend test. Every oven runs differently.
- Storing before the jerky cools completely. Trapped moisture causes mold.
- Using too much liquid smoke. It turns bitter at low temperatures over long cycles.
A digital thermometer catches the most dangerous mistake: assuming the dehydrate setting hits the right temperature. If your internal temp falls short of 160°F, you need to adjust or the batch is unsafe to eat. That's not a suggestion, it's the safe cooking threshold that food safety guidelines use across all meats.
Storing Jerky: Timing, Containers, and Refrigeration Rules
Freshly finished jerky is at its peak the first few days. Stored properly, it stays good for weeks. Stored poorly, it grows mold.
No gray areas.
Airtight containers win for home batches. Mason jars with sealed lids work. Vacuum-sealed bags work even better by removing the oxygen mold needs to survive.
Keep the jerky in a cool, dark cabinet away from sunlight and heat.
Shelf life at room temperature is one to two weeks. That's the practical window for homemade jerky without preservatives. Refrigerated jerky holds up for up to three months.
Frozen jerky stays good for six months or more when vacuum sealed.
The conditioning step we mentioned earlier is your mold insurance. After the jerky cools, pack it in a jar with the lid loose for 24 hours. If droplets appear on the glass, the jerky still holds moisture.
Return it to the dehydrate mode for another 30 to 60 minutes.
Watch for signs of spoilage. Hard spots, white or green fuzzy spots, an off smell, or a slimy sheen all mean one thing: toss the batch. Don't try to salvage it.
Toaster Oven vs. Dehydrator vs. Air Fryer: Which Actually Works Better?
Each option dries meat well, but the strengths differ. Your choice should depend on batch size, prep time, and how often you plan to make jerky.
| Option | Drying Consistency | Batch Size | Extra Uses |
|---|---|---|---|
| Toaster oven | Good, depends on fan | Small to medium | Baking, roasting, toasting |
| Dedicated dehydrator | Excellent | Large | Jerky, fruit leather, herbs |
| Air fryer | Good, often fast | Small | Frying, roasting, dehydrating |
A dedicated dehydrator delivers the most even airflow and the largest capacity. If you make jerky monthly, it's worth the cabinet space. But a toaster oven with a real dehydrate mode handles small batches without adding a new gadget.
Air fryers with dehydrate settings dry faster because the fan is more aggressive. That speed can be a downside, because it's easier to over-dry the edges before the centers catch up. If you already own one, it works, but expect to check the progress more often.
The bottom line: for occasional weekend batches, a toaster oven is perfectly capable. For serious volume, a dehydrator is easier to set and forget. If you're already wondering about how these appliances stack up, the jerky method works on both, just with different timing.
Quick Answers to Common Jerky Questions
Can I dry jerky at a lower temperature?
Technically yes, but it's not recommended. Below 160°F (71°C), the drying process takes longer and sits inside the bacterial danger zone. The USDA FSIS recommends keeping beef jerky at 160°F for safety.
If your toaster oven can't hold that temperature in dehydrate mode, use a different method or plan on finishing the jerky in a preheated oven for a short period to reach the internal target.
Do I need curing salt?
Curing salt is optional for most home batches. It helps protect against botulism and gives jerky that classic preserved flavor and color. If you're making thick-cut jerky or planning long-term storage, it's worth using.
For thin strips eaten within two weeks, skip it and rely on 160°F and proper storage.
Why is my jerky chewy instead of crispy?
Chewy is actually the goal. Proper jerky bends and cracks without snapping. Crispy usually means over-dried.
It's still safe to eat, but the texture is more like a cracker than jerky. If you prefer a softer bite, pull the strips earlier and condition them in a jar for a day.
How long does homemade jerky last?
Airtight storage at room temperature keeps jerky good for one to two weeks. Refrigerated jerky lasts up to three months. Vacuum-sealed and frozen, it stays good for six months or more.
Always check for mold, off smells, or sliminess before eating stored jerky.
Can I use ground beef for jerky?
You can, but the process changes. Ground beef must be formed into thin strips and dried at 160°F for a longer period. The texture is drier and more crumbly.
Most home jerky makers prefer whole muscle cuts for a better, more classic bite.
Final Safety Checklist Before You Start
Run through this quick list before every jerky batch. It takes two minutes and prevents most common failures:
- ✓ Start with lean beef and trim visible fat completely
- ✓ Slice evenly, between 1/8 and 1/4 inch thick
- ✓ Marinate in the refrigerator, never on the counter
- ✓ Pat every strip dry before arranging on the rack
- ✓ Leave space between strips for airflow
- ✓ Set dehydrate mode to 160°F (71°C)
- ✓ Place a drip pan below the rack
- ✓ Confirm internal temperature reaches 160°F with a probe thermometer
Jerky making is a small investment of time with a big payoff. The first batch teaches you how your specific oven behaves. The second batch dials in your flavor.
By the third, you'll have a workflow that fits your kitchen and your taste.
Stick to the safety rules, test your finished texture, and don't rush the cool-down. Done right, you'll have a shelf of homemade jerky that beats anything in a foil packet.