
Figuring out how to convert regular baking recipes to an air fryer toaster oven trips up almost everyone at first. Your recipe card was written for a big, gentle oven cavity. These compact machines run hotter up close and finish faster.
Burnt bottoms and raw middles aren't bad luck, they're physics.
The good news: the fix takes two moves, not twenty. Drop the temperature 25°F and start checking early. Manufacturer specifications indicate these ovens preheat in 3 to 5 minutes, with elements sitting inches from the pan.
That proximity is why your old numbers fail, so let's unpack what's really happening inside.
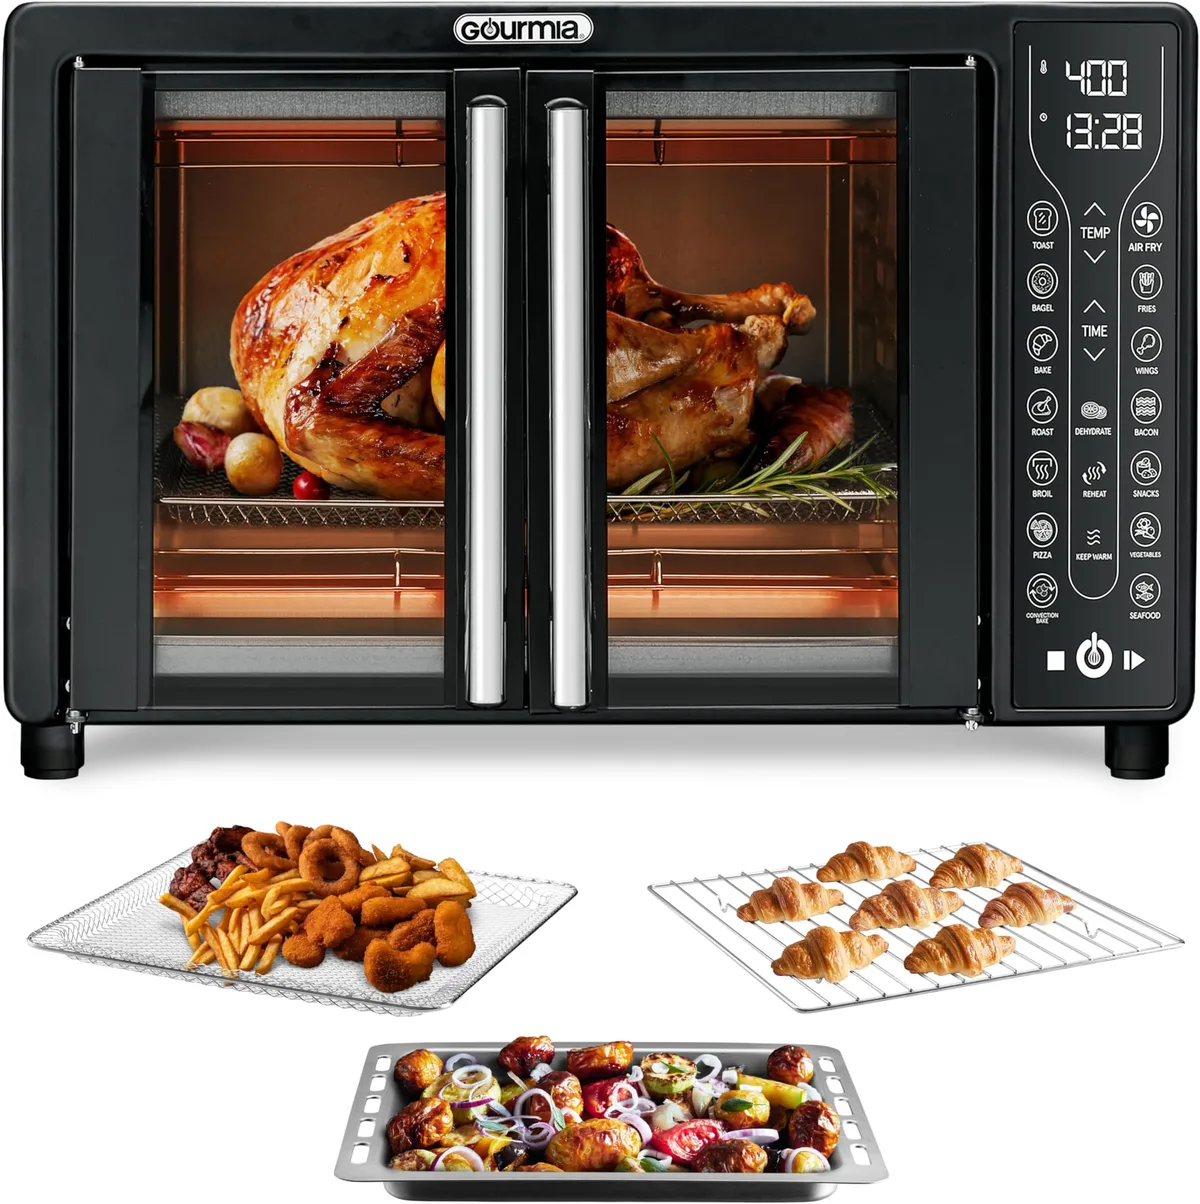
Quick Answer
Converting regular baking recipes to an air fryer toaster oven takes two adjustments. Lower the recipe temperature by 25 degrees Fahrenheit. Start checking doneness at half the original bake time.
Use light aluminum pans centered on the middle rack. Confirm doneness with a toothpick or instant-read thermometer.
Why Regular Recipes Fail in an Air Fryer Toaster Oven
In our research across owner reviews and manufacturer manuals, the same complaint repeats constantly: scorched bottoms with pale centers. A regular recipe assumes a big box with distant, mild heat. Your countertop oven breaks that assumption three ways.
- The elements sit close. In most units, the top element hangs 3 to 4 inches above the rack. A wall oven keeps its elements a foot or more away. That gap is why surfaces brown while centers lag behind.
- The fan pushes heat hard. Moving air strips away the cool layer resting on your pan, so exteriors cook 20 to 30 percent faster than the recipe expects.
- The cavity is tiny. Less air mass means temperatures swing quickly and recover quickly. Excess heat has nowhere to hide.
None of this makes the appliance bad at baking. It just plays by different rules. Basket models can't hold a cake pan level, which is exactly why oven-style designs win for real bakeware.
Our side-by-side of basket-style cousins walks through those layout differences.
The Core Conversion Rule: Drop 25°F, Check at Half Time
Here's the whole method in one breath. Lower the recipe temperature by 25°F, then start checking for doneness at half the original bake time. Everything else in this guide just refines that rule.
Baking in Celsius? Subtract 15°C instead. Same math, different scale.
See how it plays out with common settings:
| Original recipe | Converted temp | First check |
|---|---|---|
| 350°F for 12 minutes | 325°F | 6 minutes |
| 375°F for 20 minutes | 350°F | 10 minutes |
| 400°F for 25 minutes | 375°F | 13 minutes |
Treat that first check as data, not a verdict. If the bake looks pale, close the door and look again in 2 to 3 minutes.
Two exceptions matter. Skip the temperature drop if the recipe was already written for convection. And lean toward the longer end for dense batters, because those branches get their own treatment below.
How Convection Changes the Math: Elements, Fan Speed, and Element Proximity
Convection baking means a fan circulates hot air around the food instead of letting it sit in still layers. That moving air is the whole story. Still air acts like insulation around your pan, while circulating air scrubs that shield away and transfers heat faster.
Not all fans work the same way, though. True convection adds a heating element behind the fan itself. Fan-only models simply recirculate whatever the top and bottom elements produce.
Both convert with the same rule, but fan-only units tend to run hotter right beside the elements, so pan placement matters even more.
As of 2026, most models in this class draw 1,500 to 1,800 watts, and manufacturer specs put preheat around 3 to 5 minutes. Recovery is quick, but a cold pan loaded mid-bake still drags the cavity temperature down. Resist the urge to peek.
Wondering what that draw means on your bill? We've broken down typical power draw in detail. Short version: running costs per session stay low compared with firing up a full-size wall oven.
The Step-by-Step Conversion Workflow for Any Recipe
Follow these steps in order and the conversion becomes routine.
- Write down the original temperature, time, and pan size.
- Measure your cavity. Pick a pan that leaves 1 to 2 inches of clear space on every side.
- Swap dark nonstick or glass pans for light-colored aluminum.
- Preheat on Bake mode for 3 to 5 minutes.
- Set the dial to the original temperature minus 25°F.
- Load the pan dead center on the middle rack.
- Check at half the stated time. Rotate the pan front to back.
- Test doneness properly: toothpick for cakes, set edges for cookies, thermometer for breads.
- Cool on a wire rack so carryover heat finishes the bake gently.
One shortcut category deserves a warning. Canned refrigerated dough browns unusually fast on the bottom in these ovens. Drop the temperature a full 50°F for it and check early.
Our notes on canned refrigerated dough cover the timing quirks.
Decision Branches by Food Type
The base rule travels well, but each family of bakes bends it differently. Find your category, then follow its branch.
| What you're baking | Temp move | First check | Watch for |
|---|---|---|---|
| Cakes, muffins, cupcakes | -25°F | 60% of time | Sunken centers |
| Cookies, scones | -25°F | 50% of time | Fast bottom browning |
| Quick bread loaf | -25°F | 75% of time | Dark crust, raw middle |
| Yeast bread | -25°F | 70% of time | Dense crumb |
| Frozen doughs | -25°F | 50% of time | Overdone exterior |
| Cheesecake, custard | Hold or -25°F | 80% of time | Cracked tops |
Cakes, Muffins, and Cupcakes (Batter-Based)
Batters need steady, moderate heat and time to set. Drop 25°F, fill pans half to two-thirds full, and check at about 60 percent of the stated time. A toothpick should come out clean or with dry crumbs.
Don't open the door before that first check, because a small cavity dumps heat fast and sunken centers follow.
Cookies, Scones, and Sheet-Pan Bakes
This is where compact ovens genuinely shine. Expect crisp edges and soft centers sooner than the card promises. Check at half time, rotate the pan, and pull cookies when the edges set even if the middles look underdone.
They firm up as they cool. Trim parchment to fit the pan so loose corners never ride up into the fan.
Quick Bread Loaves and Yeast Breads
Deep loaves are the stubborn case. The crust browns early while the center needs nearly the full original time, so keep the 25°F drop but extend your patience. Banana bread is done near 200 to 205°F internal.
University of Minnesota Extension puts everyday yeast loaves closer to 190 to 200°F. Trust the thermometer, not the color.
Frozen Doughs and Store-Bought Bakes
Package directions assume a conventional oven, so apply the same conversion. Frozen cookie dough, cinnamon rolls, and store-bought garlic loaves all brown quickly on the outside. Start checking at half the printed time.
Our timing notes for store-bought garlic loaves show just how much faster these run in practice.
Cheesecakes and Delicate Custard-Style Bakes
The hardest branch, and honestly the least forgiving. Choose a 6- or 7-inch springform, select the lowest fan setting your unit offers, and hold the temperature near 300 to 325°F. Expect a longer bake than the recipe states, and tent foil over the top if it colors early.
A water bath rarely fits these cavities, so accept some crack risk or plan a topping to cover it.
Choosing Bakeware That Fits: Size, Material, and Color
Pan size comes first, because an oversized pan wrecks everything else. Most units comfortably hold an 8×8 square, a quarter sheet pan, or a 6-cup muffin tin. A standard 9×13 usually blocks the fan.
Check interior height too, since tall loaf pans and bundt pans often sit dangerously close to the top element.
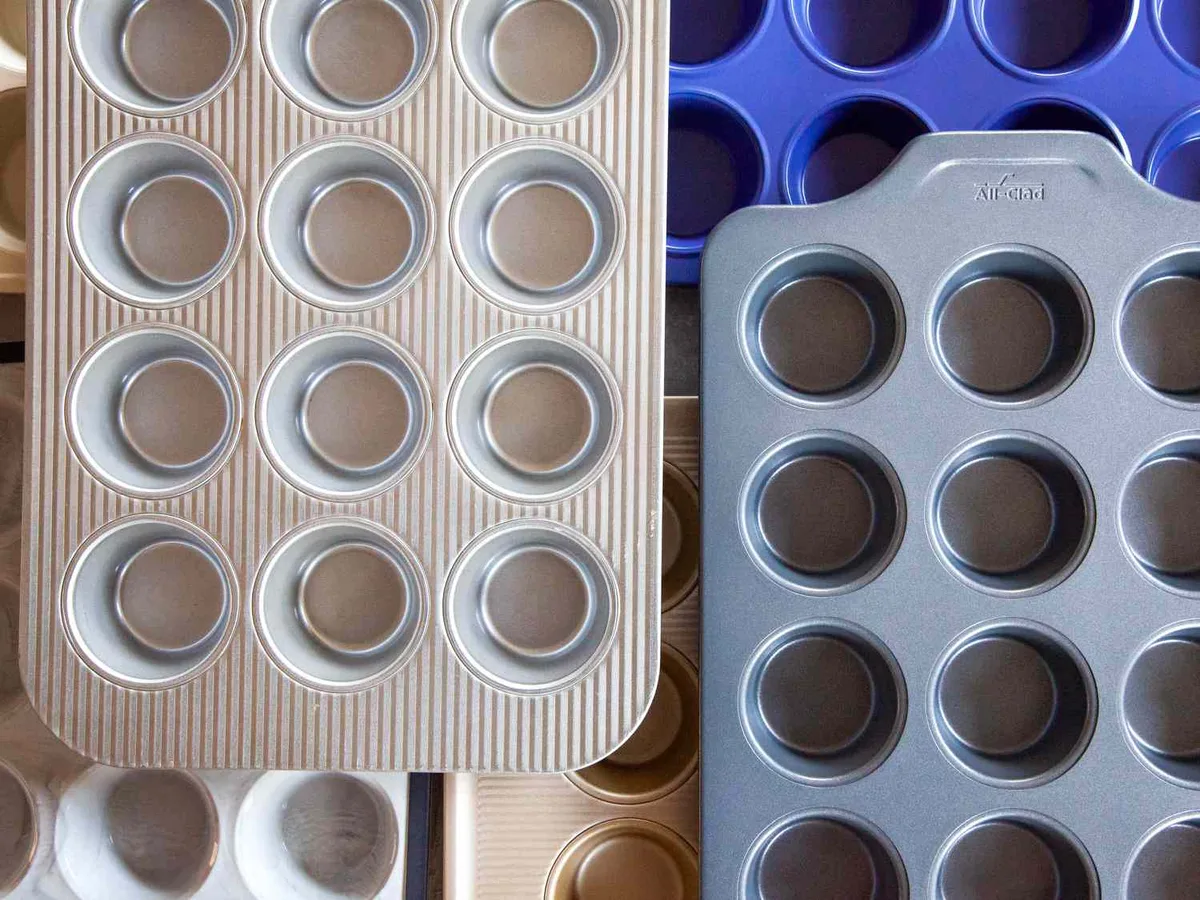
Material decides how evenly your bake browns:
| Pan type | What happens | Verdict |
|---|---|---|
| Light aluminum | Reflects radiant heat, browns evenly | Best choice |
| Dark nonstick | Absorbs heat fast, dark bottoms | Works with an extra 25°F drop |
| Glass | Heats slowly, shatter risk near elements | Avoid in compact cavities |
| Silicone | Insulates, stretches bake times unpredictably | Skip for cakes |
Dark pans aren't banned, they just demand compensation. Verified buyer feedback reports consistently darker undersides with nonstick finishes in these ovens. If dark pans are all you own, subtract another 25°F and start checking even earlier than the base rule suggests.
Rack Position, Airspace, and Mid-Bake Rotation
Where the pan sits changes the outcome more than any dial setting. The middle rack keeps equal distance from top and bottom elements, which is exactly what batter-based bakes need. Center the pan and leave 1 to 2 inches of clear space on every side so air keeps moving.
From there, apply simple corrections:
- If bottoms brown too fast, move the rack up one level.
- If tops color early, drop the rack down or tent foil loosely over the pan.
- If one side browns darker, rotate the pan front to back at the halfway mark.
That last fix matters because small cavities develop hot spots. Aggregate reviews report heavier browning toward the back on many models, right where the fan exhaust sits. One turn mid-bake evens out most of it.
Bake Mode vs. Air Fry Mode: Which Setting Converts Best
Use Bake mode for converted recipes, almost always. Bake mode runs a gentle, steady fan that mimics a home convection oven. Air Fry mode blasts high-velocity heat built for crisping surfaces, and delicate batters collapse under that treatment.
| Setting | Fan behavior | Right tool for |
|---|---|---|
| Bake | Low, steady circulation | Cakes, muffins, breads, custards |
| Air Fry | High-speed forced air | Frozen snacks, crisping fat-rich doughs |
| Toast or Roast | Element-heavy, minimal control | Leave these alone for conversions |
One advanced tweak exists, but treat it as optional. Some experienced users switch sheet cookies to Air Fry mode for the final minute to sharpen the edges. That's a refinement after you know your unit, never a starting point.
If you want the deeper background on how this fan-driven cooking compares with traditional equipment, our guide to full-size convection ovens explains the overlap.
The First-Batch Calibration Test: Learning Your Specific Unit
Every unit runs a little differently, so calibrate yours before trusting any formula. Bake a half batch of drop cookies or a boxed muffin mix using the standard conversion. Write down what actually happened: the time you pulled it, the rack you used, and where the browning concentrated.
A $10 standalone oven thermometer reveals whether your dial tells the truth. Set the unit to 350°F, let it preheat fully, then read the thermometer through the glass. Editorial analysis of owner feedback suggests many countertop units drift 10 to 25°F off their setpoint.
Knowing your offset turns guesswork into arithmetic.
Run three logged batches before drawing conclusions. After that, you'll know whether your machine runs hot, cold, or true, and every future conversion becomes a one-step adjustment. Testing costs almost nothing either, since these ovens sip electricity compared with firing up a wall oven.
We've laid out the real running costs if you're curious.
9 Conversion Mistakes That Ruin Bakes (and the Fixes)
Most failed bakes trace back to a short list of avoidable errors. Here they are, with the fix attached to each one.
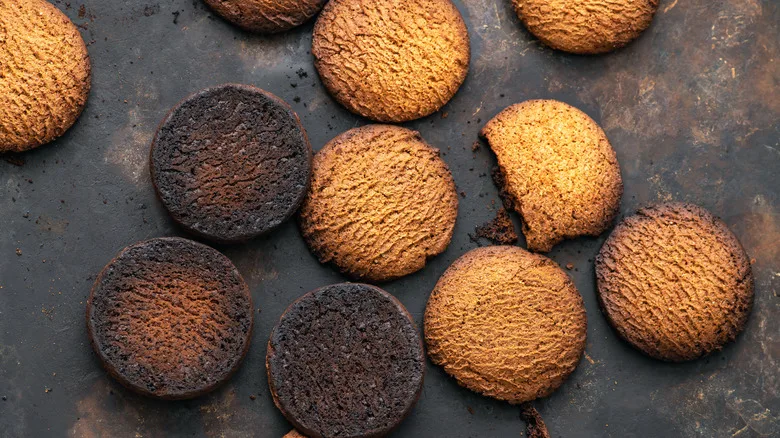
- Skipping the temperature drop. Scorched tops and raw centers follow. Subtract 25°F unless the recipe already says convection.
- Trusting the printed time. Timers assume still air. Check at half the stated time and judge by color and texture instead.
- Using dark or glass pans. This is the classic burnt-bottom setup. Switch to light aluminum and the problem usually disappears.
- Cramming in oversized pans. Blocked airflow means lopsided bakes. Measure your cavity before you commit to a pan.
- Peeking every two minutes. Each opening dumps heat, and small cavities recover slowly. Sunken cake middles come from this habit.
- Loose parchment or foil. Unsecured sheets ride the fan up into the top element. Trim everything to fit and weigh the corners.
- Skipping preheat. Batter loaded into a cold cavity rises poorly and bakes dense. Give it the full 3 to 5 minutes.
- Overfilling pans. Overflow lands directly on the heating element and smokes. Fill pans half to two-thirds full, no higher.
- Assuming perfectly even heat. Compact ovens have hot spots. Rotate the pan front to back at the halfway mark, every time.
Two ingredients deserve special caution. Refrigerated canned dough burns on the bottom faster than almost anything else you'll bake, so drop a full 50°F for it. Our walkthrough on getting canned biscuits right covers the timing.
Store-bought frozen doughs behave similarly, and our notes on frozen garlic bread show how much quicker they finish than the package claims.
One last warning belongs here. Underbaked middles aren't just disappointing, since raw flour and eggs carry real risk. The USDA publishes safe minimum internal temperatures, and they apply to countertop ovens exactly as they do to full-size ones.
Foil, Parchment, and Glass: Safety Rules for Compact Ovens
Foil works fine when it stays put. Tuck it flat onto the tray or crimp it over pan edges so the fan can't lift it into the top element. Never line the cavity floor unless your manual explicitly allows it, because reflected heat can damage the coating underneath.
Parchment gets trimmed to pan size, always. Loose corners ride the airflow upward toward the elements. Wax paper is completely off the table, since its coating isn't heat-rated.
Paper goods of any kind belong nowhere near open coils, and we've explained why paper products fail in these machines in detail.
Glass demands extra respect in a compact chamber. Use only bakeware labeled oven-safe or borosilicate, and never move it straight from the fridge into a preheated cavity. Thermal shock shatters ordinary soda-lime glass, and buyer feedback reports occasional cracking with unlabeled dishes.
Match the machine's own rules too. Choose a UL-listed model, keep several inches of clearance behind and beside the unit, and unplug it before removing the crumb tray. When in doubt, your manual overrides everything written here.
Expert Tips for Predictable, Repeatable Results
Small habits separate consistent bakers from frustrated ones. Tape a simple log inside a cabinet door and record four things per bake: temperature set, time pulled, rack used, and result. After ten entries, you'll know your unit better than any chart can.
Weigh your ingredients instead of scooping. Small batches amplify measuring errors, so 10 grams of extra flour matters far more in a half recipe than a full one. Halve recipes with actual math rather than eyeballing, and bring batters to room temperature so they spread evenly in shallow pans.
Two more tricks earn their keep daily. Preheat with the rack already positioned where you want it. And tent foil loosely over any bake showing fast top color, then pull it for the final stretch.
Refrigerated dough still needs gentler numbers than most recipes assume, and our biscuit walkthrough shows the adjusted timings.
FAQs: Converting Recipes to an Air Fryer Toaster Oven
Can I bake a cake in an air fryer toaster oven?
Yes, and smaller cakes turn out genuinely well. Use a 6-inch round or fill an 8×8 pan half full. Drop the temperature 25°F and check at 60 percent of the stated time with a toothpick.
Basket-style units can't hold a pan level, which our breakdown of the two designs explains.
Why did my cake sink in the middle?
Usually heat loss or early removal. Every door opening dumps hot air, and compact cavities recover slowly. Pulling the cake before the center sets causes collapse too.
Test with a toothpick at 60 percent of the stated time, then leave the door closed until it comes out clean.
Do I need to adjust recipes already written for convection?
No temperature drop needed. Those recipes already account for moving air, so keep the stated temperature. Just start checking at half the printed time, because compact cavities still finish faster than full-size convection ovens do.
What size pan fits an air fryer toaster oven?
Most units hold an 8×8 square, a quarter sheet pan, or a 6-cup muffin tin. Measure interior width, depth, and height before buying new bakeware. Leave 1 to 2 inches of clear space on every side so the fan keeps circulating properly.
Is baking this way cheaper than using a wall oven?
Generally yes. Countertop units draw 1,500 to 1,800 watts against 2,000 to 5,000 for typical wall ovens, and they preheat in minutes instead of fifteen. Exact savings depend on your utility rate and baking frequency.
Your Conversion Cheat Sheet (and When to Stick With the Wall Oven)
Pin this table somewhere handy. It compresses everything above into one glance.
| Bake | Temp change | First check | Key move |
|---|---|---|---|
| Cakes, cupcakes | -25°F | 60% | No early peeking |
| Cookies, scones | -25°F | 50% | Rotate halfway |
| Quick bread loaf | -25°F | 75% | Thermometer decides |
| Yeast bread | -25°F | 70% | 190 to 200°F internal |
| Frozen doughs | -25°F | 50% | Guard the bottoms |
| Cheesecake | Hold or -25°F | 80% | Tent with foil |
Some jobs still belong to the big oven. Skip the conversion when you're baking three dozen cookies, a tall layered celebration cake, or a water-bath custard that won't fit the cavity. Two-rack bakes don't translate either.
For everything else, this little box earns its counter space. It heats fast, sips power, and turns out honest small-batch bakes once you've calibrated it. If energy costs drive your decision at all, our look at what each session actually costs puts real numbers on the tradeoff.