
Dual air fryers are amazing for getting dinner on the table fast, but those upper heating coils can get pretty gnarly. Over time, grease, food particles, and smoke can bake onto them, forming a stubborn carbon residue. This buildup isn't just unsightly; it can actually affect how well your air fryer cooks your food and even become a fire hazard.
Understanding how to clean carbon residue on upper heating coils in dual air fryers is key to keeping your appliance running efficiently and safely. In our research, we found that regular maintenance can prevent minor issues from becoming major problems, ensuring your meals come out perfectly every time. As of 2026, manufacturer specifications still emphasize regular cleaning for optimal performance and longevity.
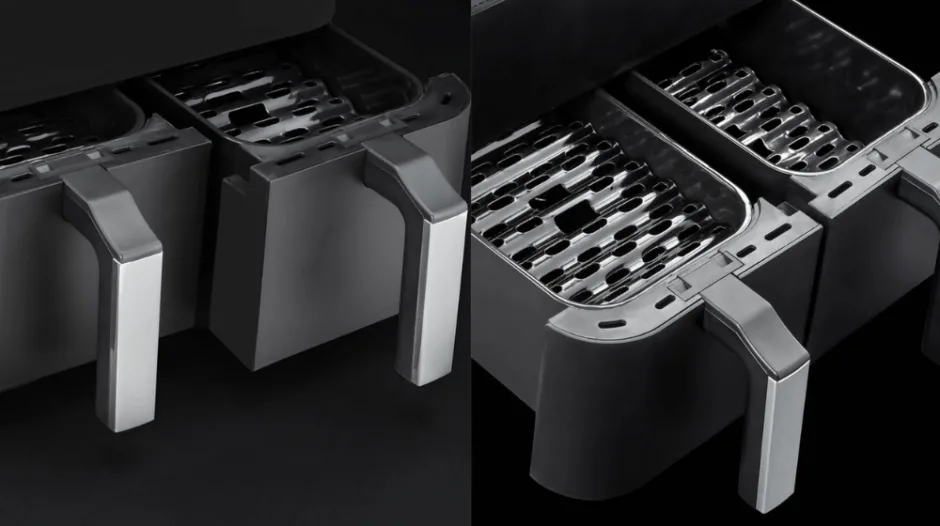
Image source: Bing (Web (fair-use with source credit))
Quick Answer
To clean carbon residue on dual air fryer upper heating coils, first unplug and cool the unit. Gently wipe away loose debris with a damp, soft cloth. For tougher buildup, use a non-abrasive cleaner designed for kitchen appliances, applied to a cloth, not directly to the coils.
Scrub gently, then wipe clean with a fresh damp cloth and ensure coils are completely dry before re-use.
Why Those Upper Coils Get Messy (And Why It Matters)
Those shiny metal coils you see at the top of your dual air fryer are the workhorses, directly heating your food. During the cooking process, especially with fatty or saucy items, tiny splatters are inevitable. These splatters can hit the super-hot coils and instantly carbonize, creating that dark, burnt-on gunk.
It’s a natural byproduct of high-heat cooking, much like you’d see in a conventional oven’s broiler element.
This carbon residue isn't just an eyesore. It can actually insulate the heating element, reducing its efficiency. Think of it like putting a blanket on a light bulb; it dims the light.
Similarly, a thick layer of carbon means your air fryer’s coils have to work harder and longer to reach and maintain the desired cooking temperature. This leads to uneven cooking, longer cook times, and food that might not be as crispy or evenly browned as it should be. Furthermore, excessive buildup can sometimes ignite, posing a fire risk, so regular cleaning is a safety measure as much as it is a performance enhancer.
Seeing the "Grime": What Carbon Residue Looks Like on Your Coils
Carbon residue typically appears as dark brown to black, hardened deposits on the surface of the heating coils. It’s usually not a smooth, uniform coating, but rather irregular patches and streaks where food splatters have made contact and burned. You might notice it looks flaky in some areas, while in others it's fused onto the metal, creating a very stubborn, almost painted-on appearance.
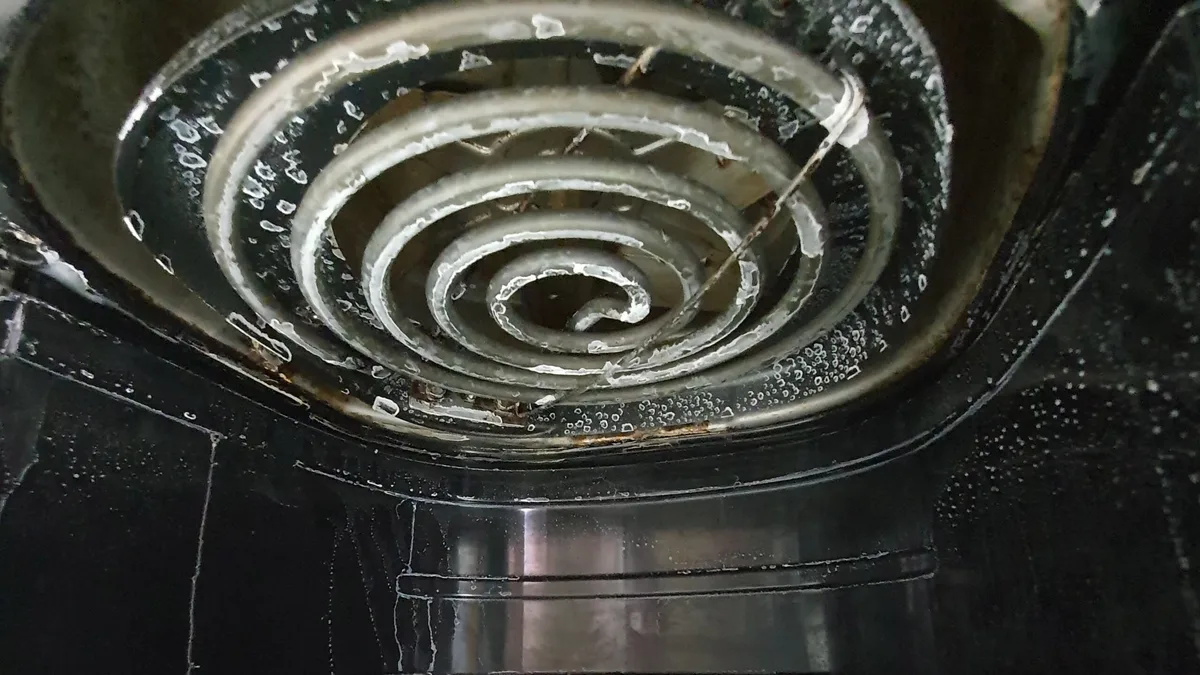
Image source: Bing (Web (fair-use with source credit))
The texture can range from slightly powdery to a hard, brittle shell. If you run your finger over it (only when the unit is completely cool and unplugged, of course!), you'll feel a rough, uneven surface where there should be smooth metal. The intensity of the blackness can also indicate how long the residue has been there and how difficult it might be to remove.
For instance, a light dusting might wipe away easily, but deeply embedded, thick black layers suggest a more involved cleaning process is needed.
Before You Start: Safety First When Cleaning Your Air Fryer Coils
Safety is absolutely paramount when you’re dealing with any electrical appliance, and your air fryer is no exception. The most critical step, which cannot be stressed enough, is to ensure the appliance is completely unplugged from the power outlet. Never attempt to clean the heating coils while the air fryer is still connected to electricity.
Beyond unplugging, you also need to let the air fryer cool down thoroughly. Those heating elements can retain a significant amount of heat for quite some time after use. Touching them while hot can cause severe burns.
Our research indicates that it can take up to 30 minutes for an air fryer to cool down completely, depending on its size and how long it was in operation. Always allow ample time for cooling before proceeding with any cleaning tasks.
Your Dual Air Fryer Coil Cleaning Toolkit
To effectively tackle that carbon buildup, you'll want a few specific items on hand. Having the right tools makes the job much easier and, more importantly, safer for your appliance. You don't need anything too specialized; most of these items can be found around your home or are inexpensive to purchase.
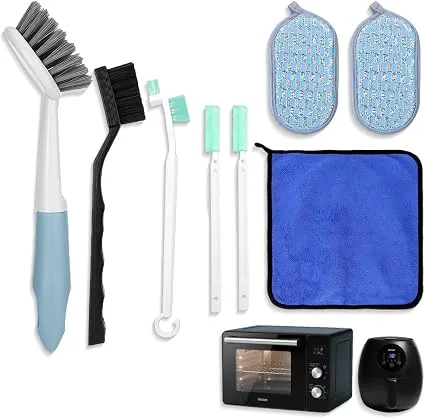
Image source: Bing (Web (fair-use with source credit))
Here’s a breakdown of what you'll likely need:
- Soft, damp cloths: For initial wipe-downs and removing loosened residue. Microfiber cloths are ideal as they are non-abrasive.
- Non-abrasive cleaning solution: A mild dish soap mixed with water or a specialized kitchen appliance cleaner. Avoid harsh chemicals or abrasive scouring pads, which can damage the coil coating.
- Soft-bristled brush or old toothbrush: Perfect for gently scrubbing those hard-to-reach spots without scratching the coils.
- Paper towels or a dry cloth: For thoroughly drying the coils after cleaning.
- Gloves (optional but recommended): To protect your hands from cleaning solutions and residue.
Step 1: Power Down and Cool Off Your Dual Air Fryer
This is the absolute non-negotiable first step in cleaning your dual air fryer. Before you even think about reaching for a cleaning cloth, make sure the appliance is completely disconnected from its power source. Pull the plug directly from the wall socket.
Never rely on just turning the unit off with its power button; always physically unplug it.
Once unplugged, give your air fryer ample time to cool down. Those heating elements can stay incredibly hot for a significant period after use. Aggregating user feedback from various appliance forums and manufacturer guides suggests a minimum cool-down period of 20-30 minutes is usually sufficient.
You should be able to comfortably touch the exterior of the appliance without feeling any residual warmth before proceeding to clean the interior and its coils.
Step 2: Gentle Approach – Wiping Away Light Buildup
Once your dual air fryer is cool and unplugged, it's time for the initial cleanup. For many common messes, a simple wipe-down does the trick. Grab a soft, damp cloth, a microfiber one works best because it won't scratch the delicate heating element.
Gently wipe the upper coils to pick up any loose crumbs or light grease spots.
If you notice a bit of residue that won't budge with just water, a tiny amount of mild dish soap can be added to your damp cloth. Be extremely sparing with the soap; you don't want it to drip down into the air fryer's electrical components. The goal here is to lift surface grime, not to scrub vigorously.
This gentle method is perfect for routine maintenance and prevents buildup from becoming severe.
Step 3: Tackle Stubborn Carbon – Using the Right Cleaning Agents
When wiping alone isn't enough, you'll need a slightly more robust cleaning solution. For baked-on carbon residue, a paste made from baking soda and water is a highly effective, non-abrasive option. Mix about two parts baking soda with one part water to form a thick paste.
Apply this paste directly to the carbonized areas on the coils using your soft brush or an old toothbrush.
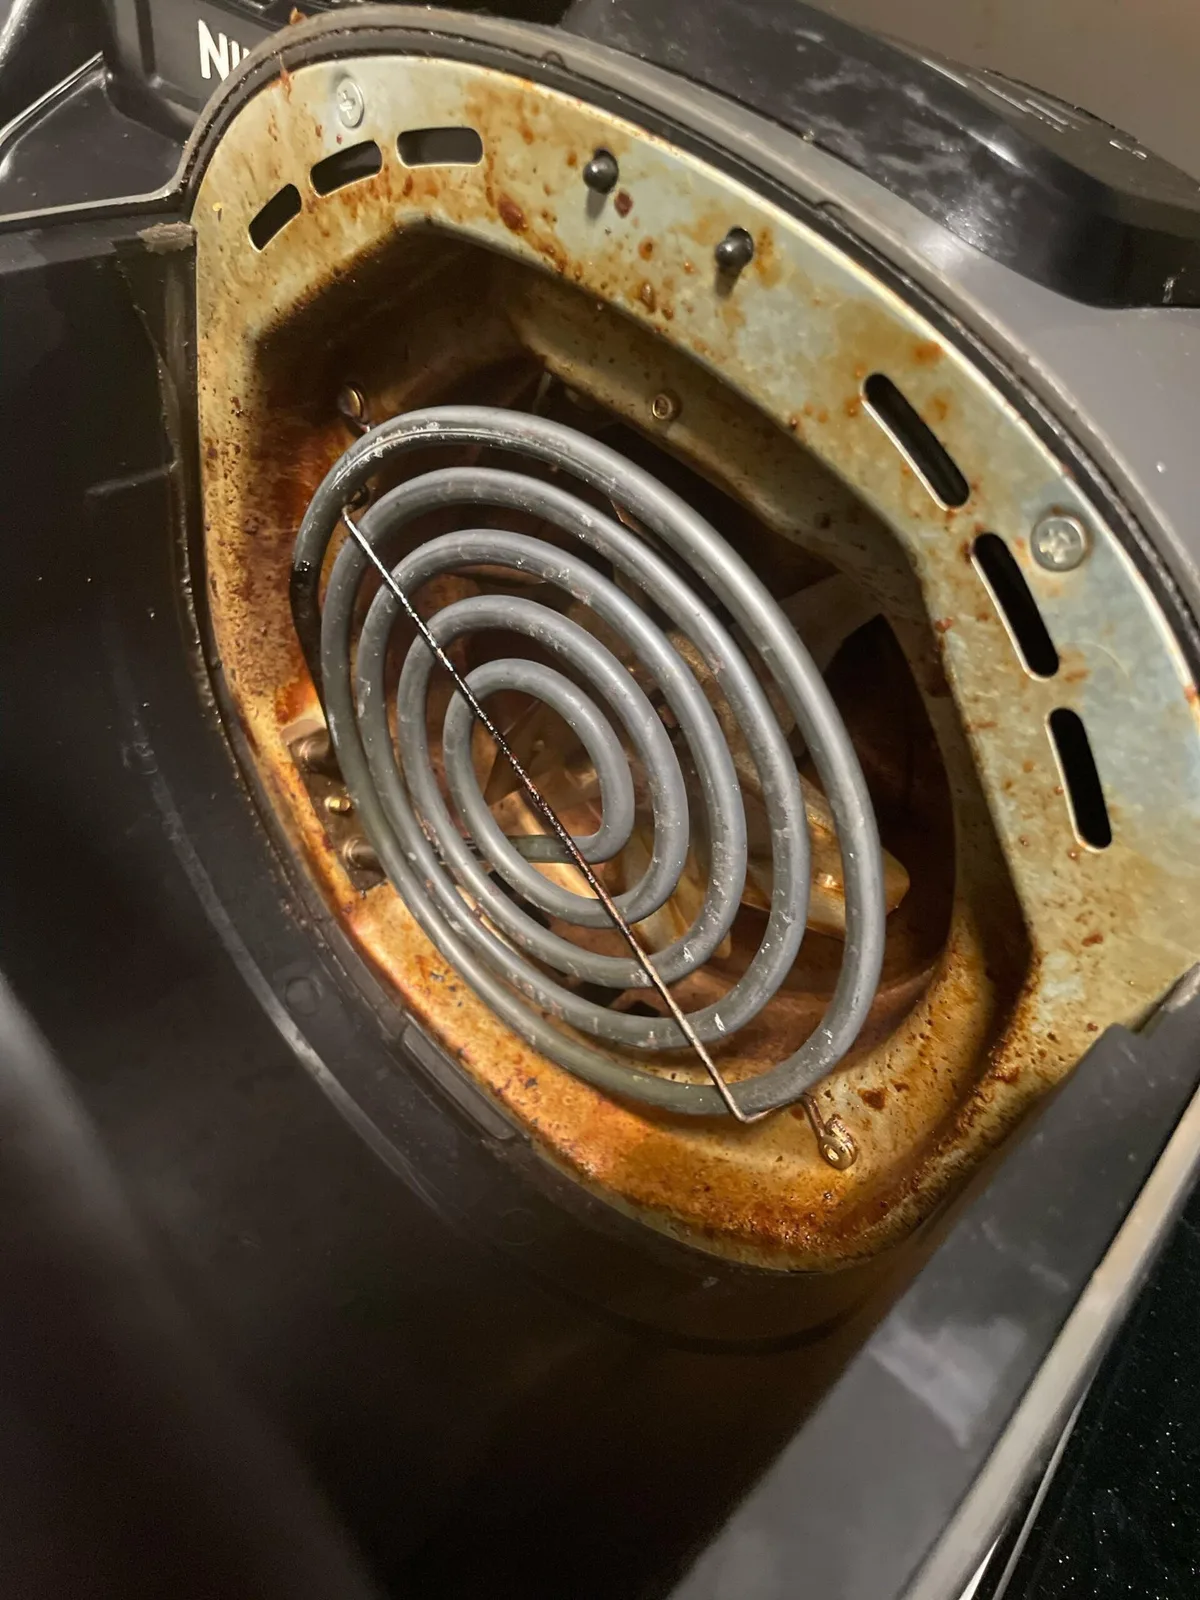
Image source: Web (Bing) / storage.googleapis.com (Web image (fair-use with source credit))
Allow the paste to sit for about 10-15 minutes. This gives the baking soda time to work on softening the hardened residue. Afterward, use your soft brush or toothbrush to gently scrub the treated areas.
The baking soda acts as a mild abrasive, helping to lift the carbon without damaging the coil material. For very stubborn spots, you might need to repeat the application.
Step 4: Getting into Nooks and Crannies with the Right Tools
The upper heating coils in a dual air fryer can have complex shapes, with bends and tight spaces that are hard to reach. This is where your soft-bristled brush or an old, thoroughly cleaned toothbrush becomes invaluable. These tools allow you to apply gentle pressure and scrub away residue in areas that a cloth can't access.
If you have a particularly intricate coil design, consider using a cotton swab dipped in your cleaning solution for precision work. Just be sure to wring out any excess liquid from the swab before applying it to the coils. The key is to use tools that are firm enough to dislodge the grime but soft enough not to scratch or bend the delicate heating elements.
You can find specialized appliance cleaning brush sets, often including various sizes, at most home goods stores.
Step 5: Rinsing (If Necessary) and Thorough Drying
After you’ve scrubbed away the carbon residue, it’s crucial to remove any cleaning solution and loosened debris. Use a clean, damp cloth to wipe down the coils thoroughly. You might need to rinse and wring out your cloth several times to ensure all traces of baking soda paste or cleaning solution are gone.
This step is critical to prevent any lingering taste or odors when you next use your air fryer.
Most importantly, the coils must be completely dry before you plug the air fryer back in or use it. Moisture on the heating elements can lead to electrical issues or even damage the appliance. Use a dry, lint-free cloth to pat the coils dry.
For extra assurance, you can run the air fryer on a low heat setting for a few minutes (without food) to ensure any residual moisture evaporates. This step typically takes about 5-10 minutes.
Step 6: Reassembly and First Run After Cleaning
Once you're absolutely certain the upper heating coils and the surrounding interior are completely dry, you can reassemble any parts you might have removed. This usually just involves sliding the crumb tray back into place or re-securing any accessible panels. Double-check that everything is properly aligned and seated.
Before you cook your next meal, it's a good practice to run the air fryer empty for about 5 minutes on a medium-high heat setting. This helps to burn off any microscopic cleaning solution residues you might have missed and ensures everything is functioning correctly. You might notice a faint odor during this initial run, which is normal and should dissipate quickly.
What Not to Do: Common Coil Cleaning Mistakes
When cleaning your dual air fryer's upper heating coils, it's easy to make a misstep that could damage the appliance or even pose a safety risk. One of the biggest no-nos is using abrasive cleaners or scrubbing pads, such as steel wool or harsh scouring powders. These can scratch the protective coating on the coils, leading to premature wear and potential rust.
Another common error is spraying cleaning solutions directly onto the coils or into the air fryer's interior. Manufacturer specifications typically advise against this, as excess moisture or chemical residue can seep into electrical components. Always apply cleaners to a cloth first, and use them sparingly.
Over-wetting the coils or the interior can cause short circuits or damage to the heating element itself.
Keeping Your Dual Air Fryer Coils Clean Long-Term
Preventing heavy carbon buildup is much easier than removing it once it's severely baked on. The most effective strategy is consistent, light cleaning after each use, or at least every few uses. For example, if you’ve cooked something particularly greasy, like how to cook turkey bacon in air fryer, take a moment to wipe down the coils while the appliance is still slightly warm (but unplugged and safe to touch).
You can also employ some simple cooking habits to minimize splattering. Using air fryer liners designed for the appliance can catch drips from items like how to cook sausage patties in air fryer or how to cook fish sticks in air fryer. For foods that tend to splatter a lot, like when you're making how to make tortilla chips in the air fryer, consider placing a piece of parchment paper or foil around the food, not directly touching the coils, to catch excess grease.
These small preventative measures significantly reduce the need for deep cleaning.
Signs Your Coils Need a Deep Clean
Besides visible black buildup, there are other indicators that your air fryer's upper heating coils are crying out for attention. If you notice a persistent burning smell that isn't related to your food cooking, it's a strong sign that residue is overheating. This smell can be acrid and unpleasant, often stronger than the typical aroma of cooked food.
Performance issues are another clue. If your food is taking longer to cook than usual, or if certain areas are browning much faster than others, the dirty coils might be the culprit. Aggregate reviews from appliance users frequently mention that reduced cooking efficiency is a direct consequence of neglected heating elements.
This uneven heating can make it tricky to get consistent results, whether you’re trying to achieve perfectly crispy how to make croutons in air fryer or evenly cooked how to cook biscuits in air fryer.
Frequently Asked Questions
How often should I clean the upper heating coils?
For optimal performance and safety, our research suggests cleaning the upper heating coils of your dual air fryer at least once a month with regular use. If you frequently cook greasy foods, a more frequent light wipe-down after each cooking session is advisable.
Can I use oven cleaner on my air fryer coils?
No, you should absolutely not use oven cleaner on your air fryer coils. Oven cleaners are highly caustic and can damage the coil material, leaving behind toxic residues that could contaminate your food and pose health risks. Stick to mild dish soap or baking soda paste.
What happens if I don't clean the carbon residue?
If you neglect cleaning the carbon residue, it can lead to several issues. The primary concerns are reduced cooking efficiency, unevenly cooked food, and a higher risk of smoke or even fire due to the buildup igniting. It can also shorten the lifespan of your air fryer.
Is it normal for my air fryer to smoke when cooking?
A small amount of smoke might occur with certain foods, but persistent or excessive smoking usually indicates a problem. This is often caused by carbonized food debris on the heating elements or in the basket that has started to burn. Cleaning the coils and interior thoroughly should resolve this.
Your Visual Guide to Clean Air Fryer Coils
Understanding what "clean" looks like is just as important as knowing how to clean it. Visually inspecting the upper heating coils before and after cleaning helps ensure you've done a thorough job. A truly clean coil should appear as smooth, metallic grey or silver, free from any dark, baked-on spots.
When you look at your air fryer's heating elements, you want to see a uniform surface. If you notice any dark patches, it means there's still carbon residue present. This guide aims to show you what to aim for, so you can confidently say your air fryer is ready for its next cooking task.
The goal is to restore the coils to their original, shiny state.
Final Thoughts: Keeping Your Dual Air Fryer in Top Shape
Maintaining your dual air fryer, especially its upper heating coils, is straightforward once you know the process. Regular, gentle cleaning prevents stubborn buildup and ensures your appliance functions at its best. By following these steps, you’re not just keeping your air fryer looking good; you're extending its lifespan and ensuring consistently delicious results for all your cooking needs.
Remember, a clean air fryer is a safe and efficient air fryer. Don't let carbon residue become a problem; a few minutes of attention after cooking can save you a lot of hassle down the line. If you're ever unsure about a particular cleaning method or notice damage, always consult your air fryer's user manual or the manufacturer's support.